
Photography is a fixed moment. Watercolor is its interpretation. Watercolor technique hides a special aesthetic: light strokes, soft color shimmers, translucency and depth. This technique fascinates not only watercolorists, but also digital designers who want to give their images artistic expression.
And the possibilities of the graphic editor Adobe Photoshop is more than enough to create really cool watercolor images. Let’s consider step-by-step instructions for processing photos in the style of watercolor.
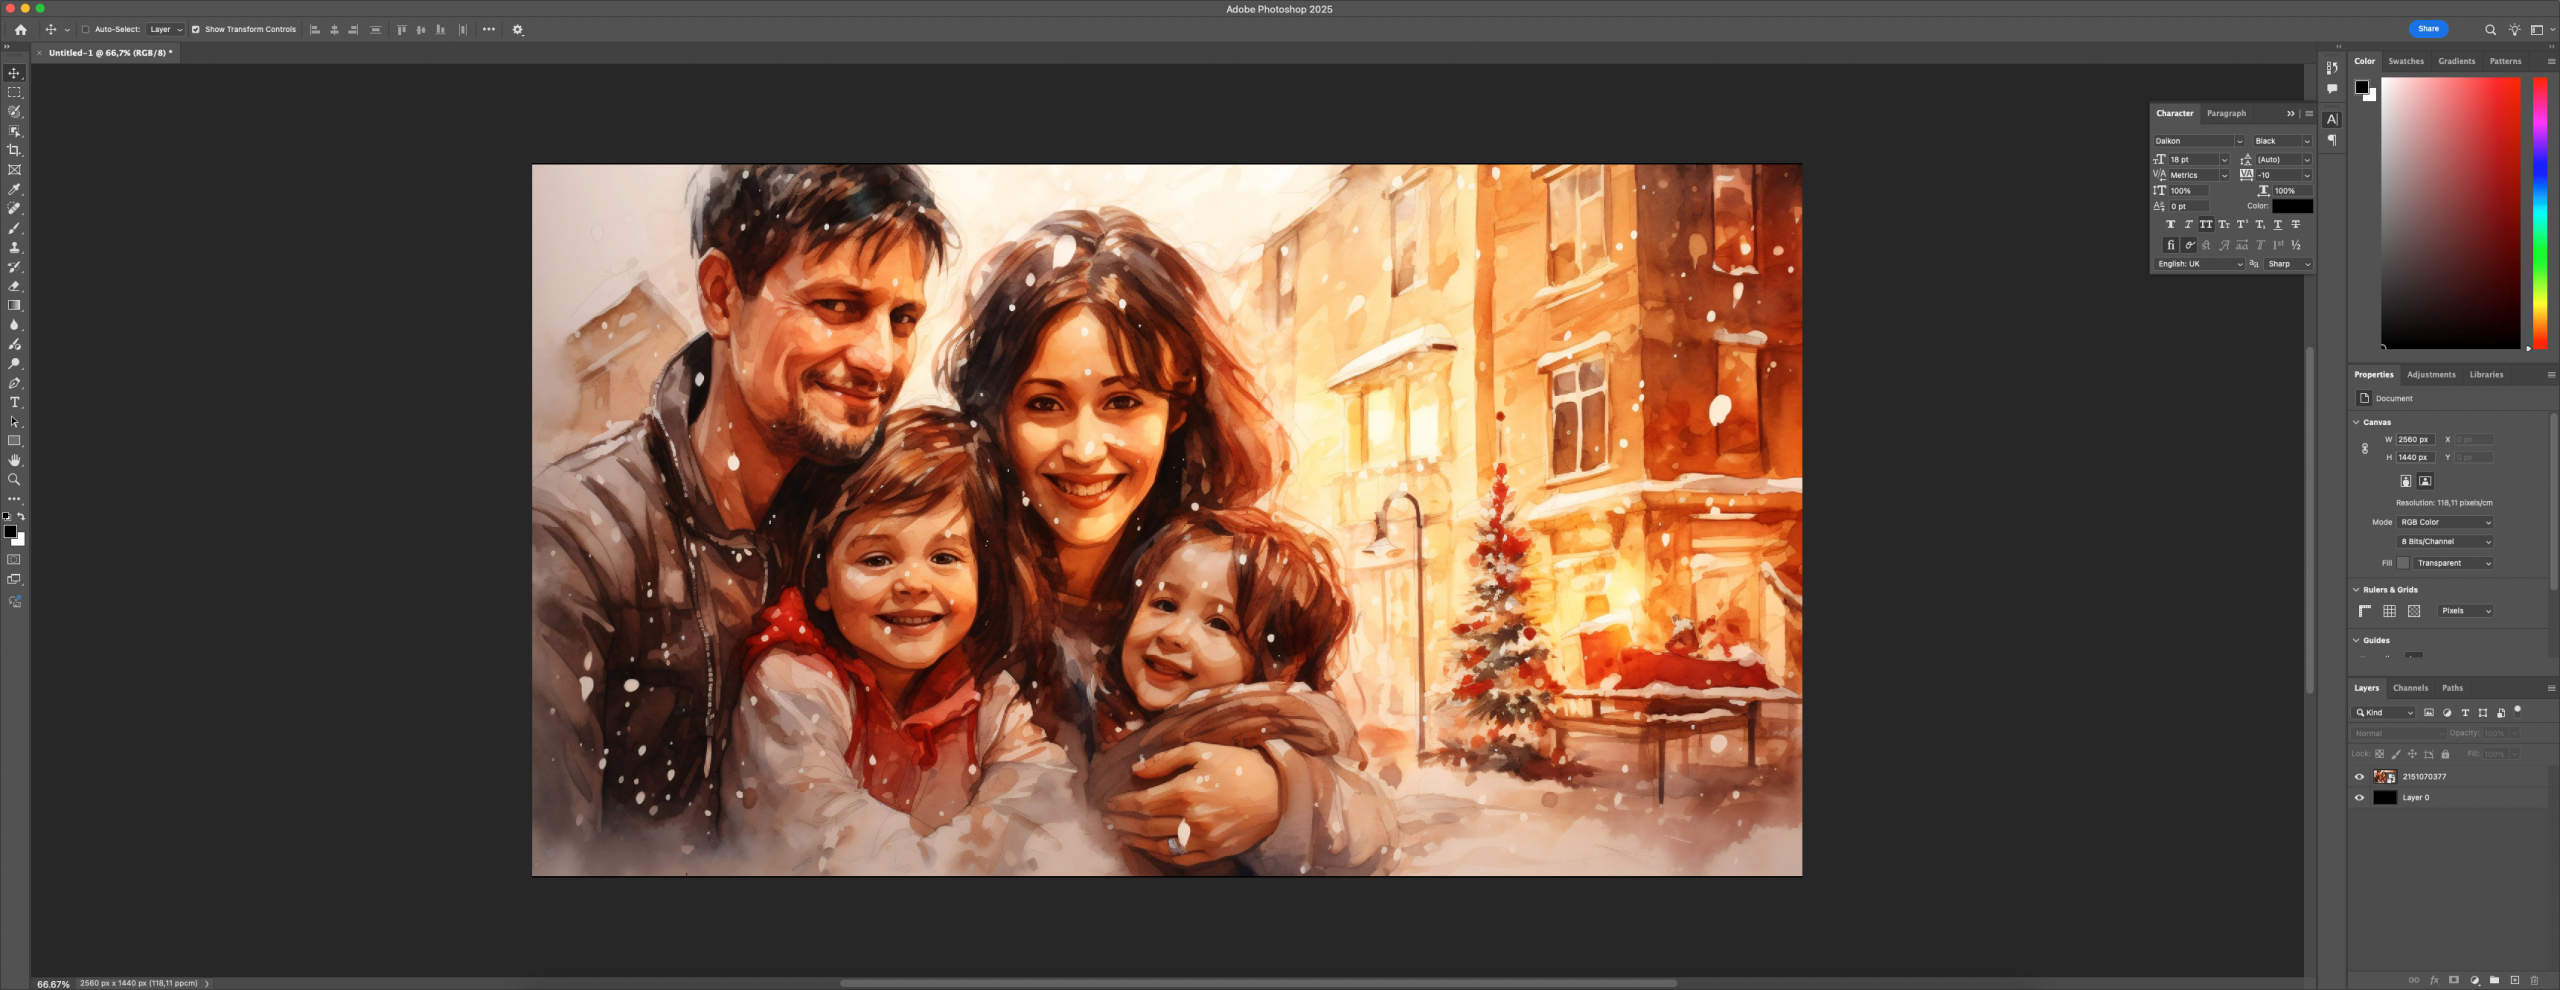
Modern Photoshop capabilities allow you to recreate watercolor style on almost any photo. And unlike traditional painting, which requires a brush, water and hours of practice, here everything is based on a competent sequence of actions, careful work with layers, filters and textures.
If you want to learn how to create a watercolor effect but don’t know where to start, you’re on the right track. This lesson is not just a step-by-step instruction, but a complete creative process. It will help you learn a technique that can be used for posters, collages, postcards, portraits, and even commercial products. And most importantly, you will cope with it even with basic Photoshop skills.
Step 1: Selecting and preparing a photo
Before you start work, it is important to understand that not every image is equally well “lie down” under watercolor. Portraits with clean backgrounds, architectural photos with good lighting or landscapes with contrasting colors are ideal.
What to do:
– Open the image in Photoshop (File → Open).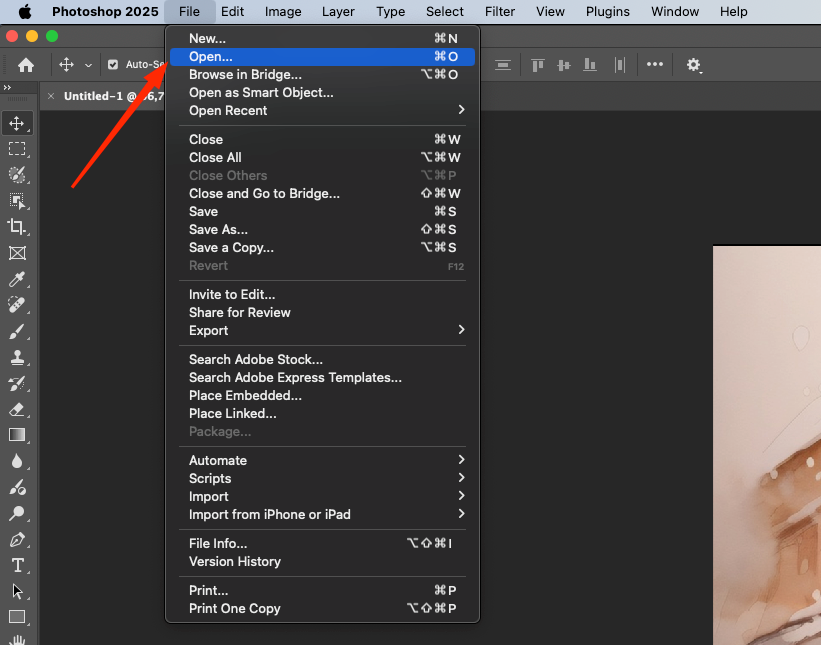 – Duplicate the main layer (Ctrl+J) so you can always go back to the original.
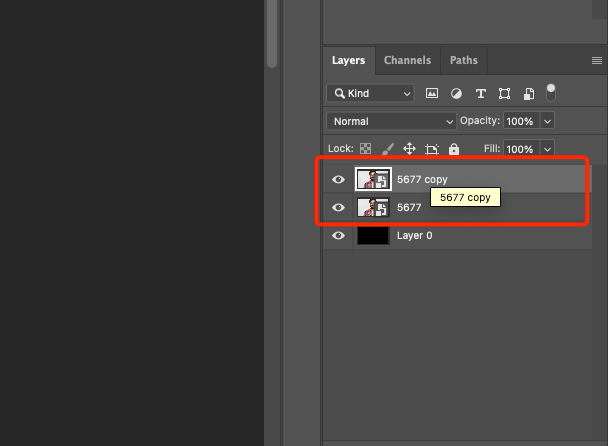 – If necessary, trim off the excess with the Crop tool.
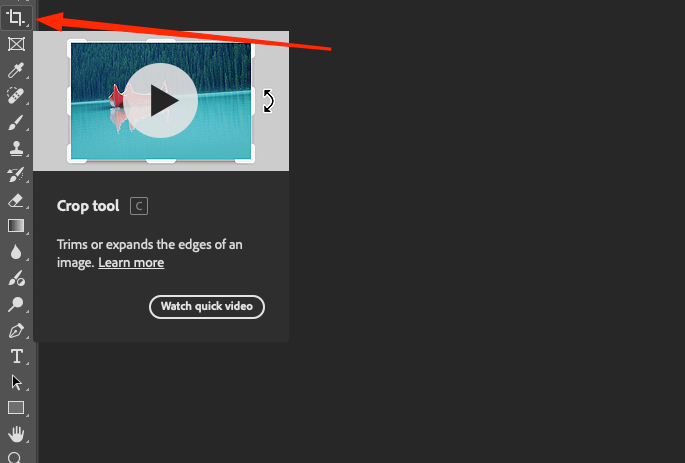 – Use Brightness/Contrast or Levels adjustment layers to improve the lighting.
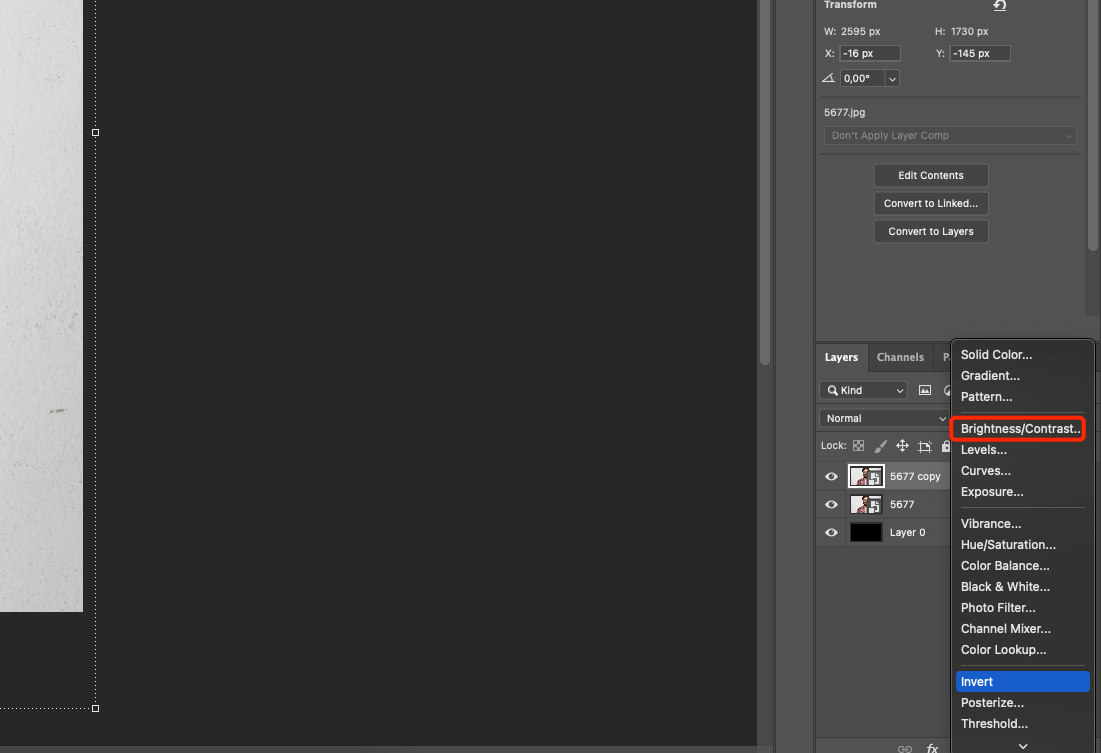 – Apply a light Sharpen filter to emphasize details better in the final work.
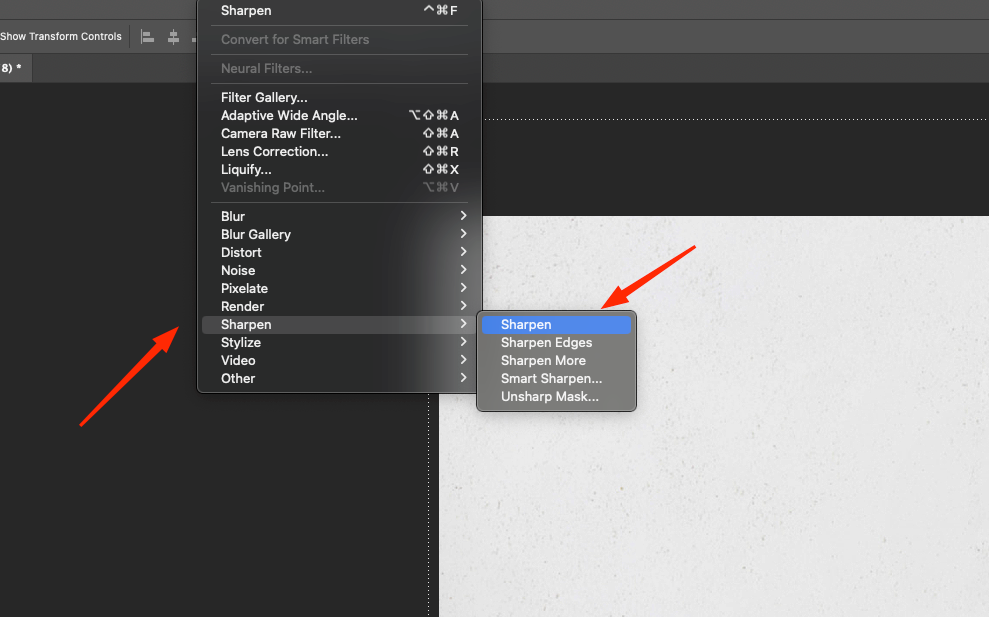
Tip: Avoid images with many small elements – they can become unreadable blobs after applying filters.
Step 2: Simulate a sketch – create a watercolor base
Many watercolor paintings start with a simple pencil drawing. In Photoshop, we can achieve a similar effect with a few steps.
How to do it:
- Duplicate the base layer.
2. Convert it to B&W (Shift+Ctrl+U).
3. Duplicate the B&W layer again.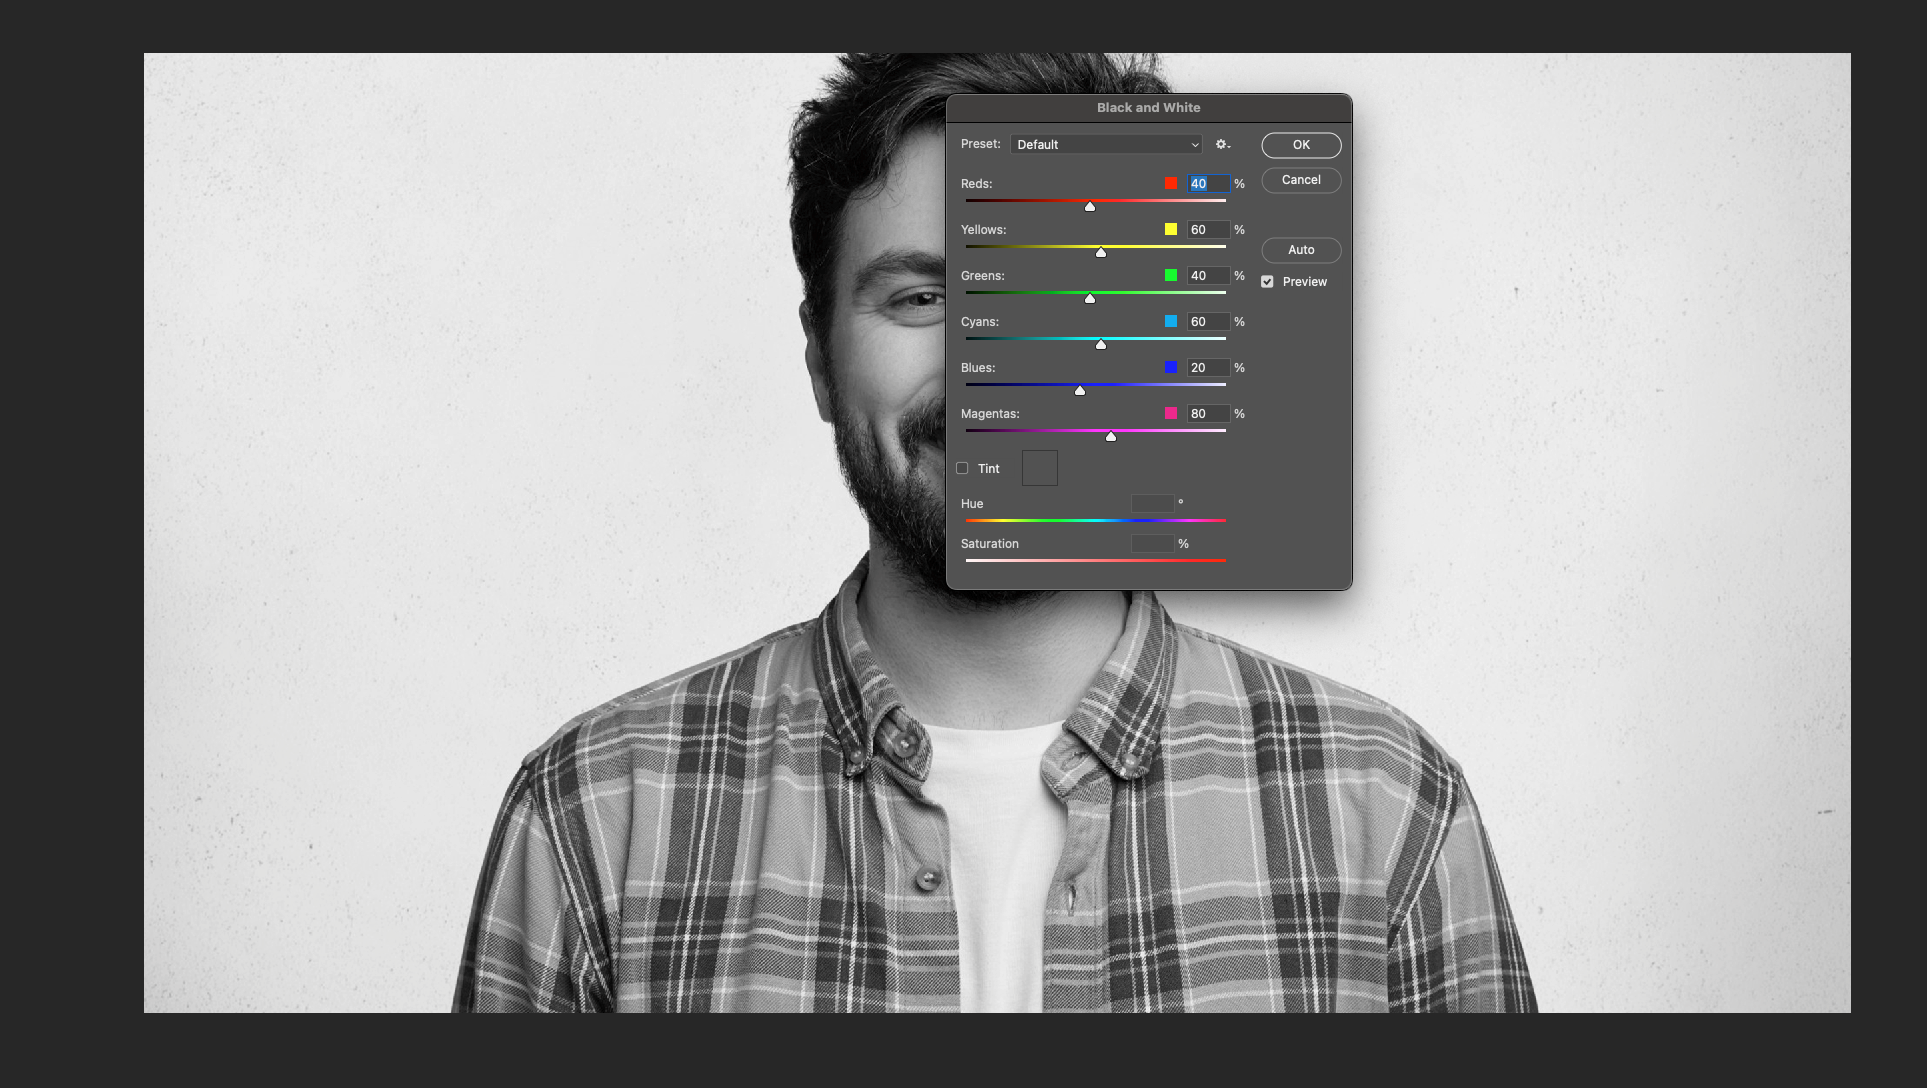 4. On the top layer, apply Filter → Stylize → Find Edges.
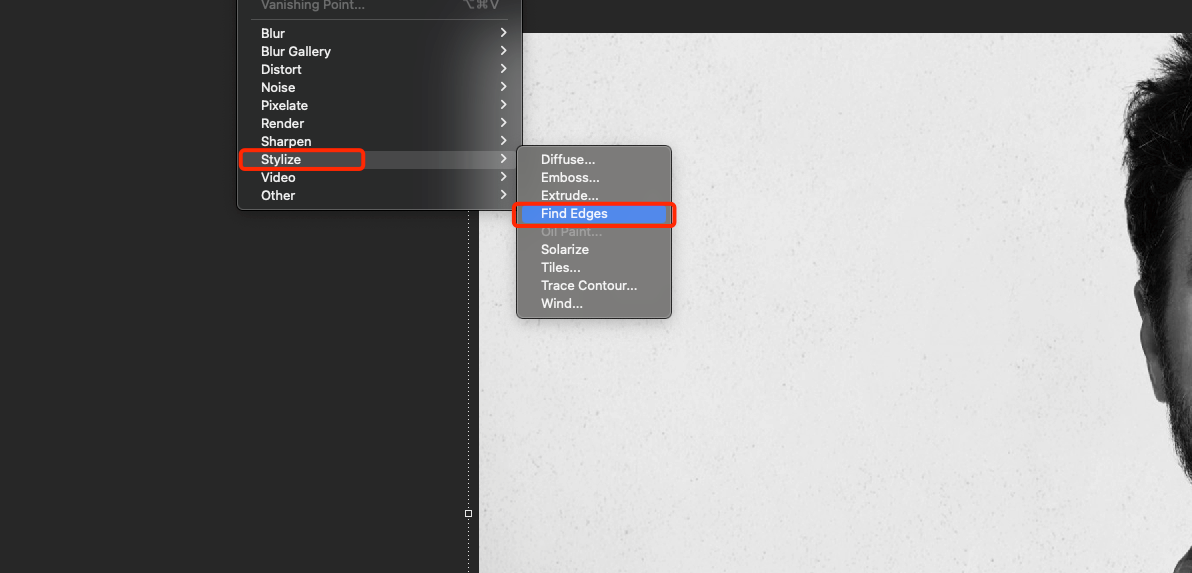 5. Invert the image (Ctrl+I) and change the blending mode to Multiply.
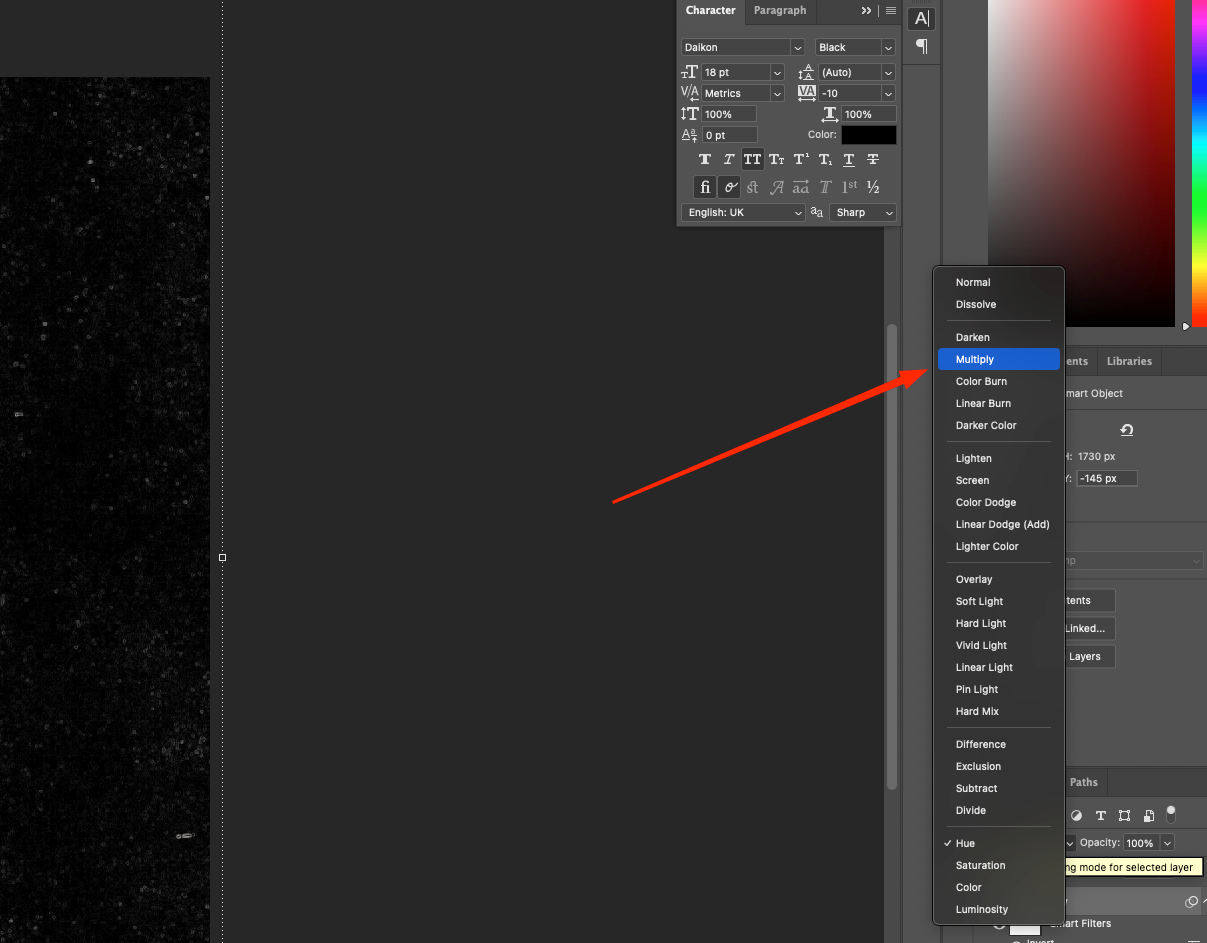 6. Group all the thumbnail layers and reduce the opacity to 50% to achieve light lines.
This layer will serve as a base and guide for further actions. It doesn’t need to be too bright – light, almost imperceptible lines will work perfectly.
Step 3: Color Accents – Brush Strokes
Create a new layer on which to manually add brushstrokes – this is where the artistry is born.
Step by step:
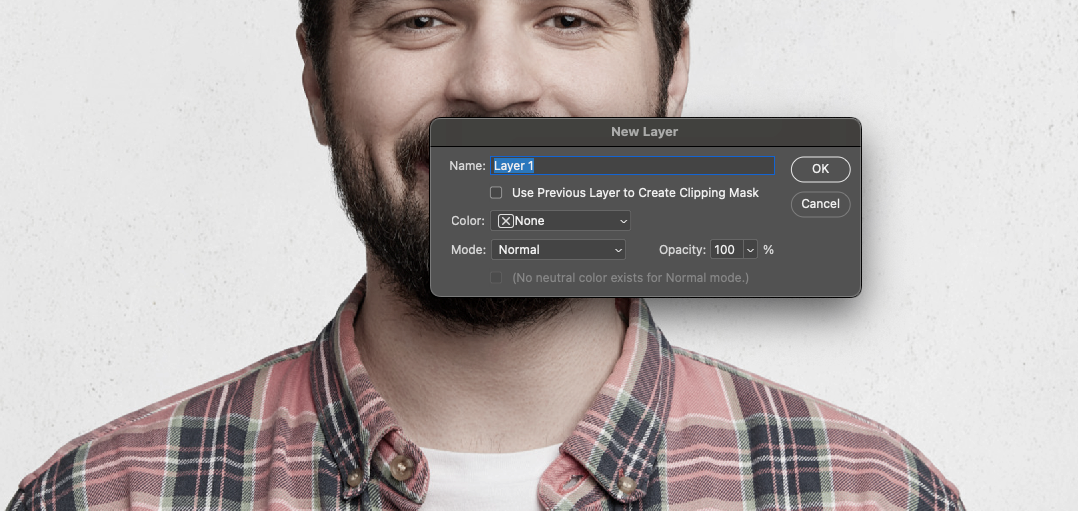
- Create a new layer (Ctrl+Shift+N).
 2. Select a soft brush with blurred edges.
3. Adjust the opacity of the brush to 20-40%.
4. With the eyedropper (I), select colors from the original photo.
5. Apply spots in different shapes – don’t be afraid to go beyond the borders.
6. Use multiple shades of the same color – this will give depth and realism.
Create separate layers for different color blocks – this will allow you to flexibly manage their brightness and transparency later.
Tip: Try changing blending modes (Overlay, Soft Light, Color) to create different effects of color and base interaction.
Read also: Basics of working with a stamp in Photoshop
Step 4: Add Paper Texture
Without the texture of watercolor paper, even the most beautiful effect loses realism. It’s not hard to find such a texture – even free Creative Commons archives will do.
What to do:
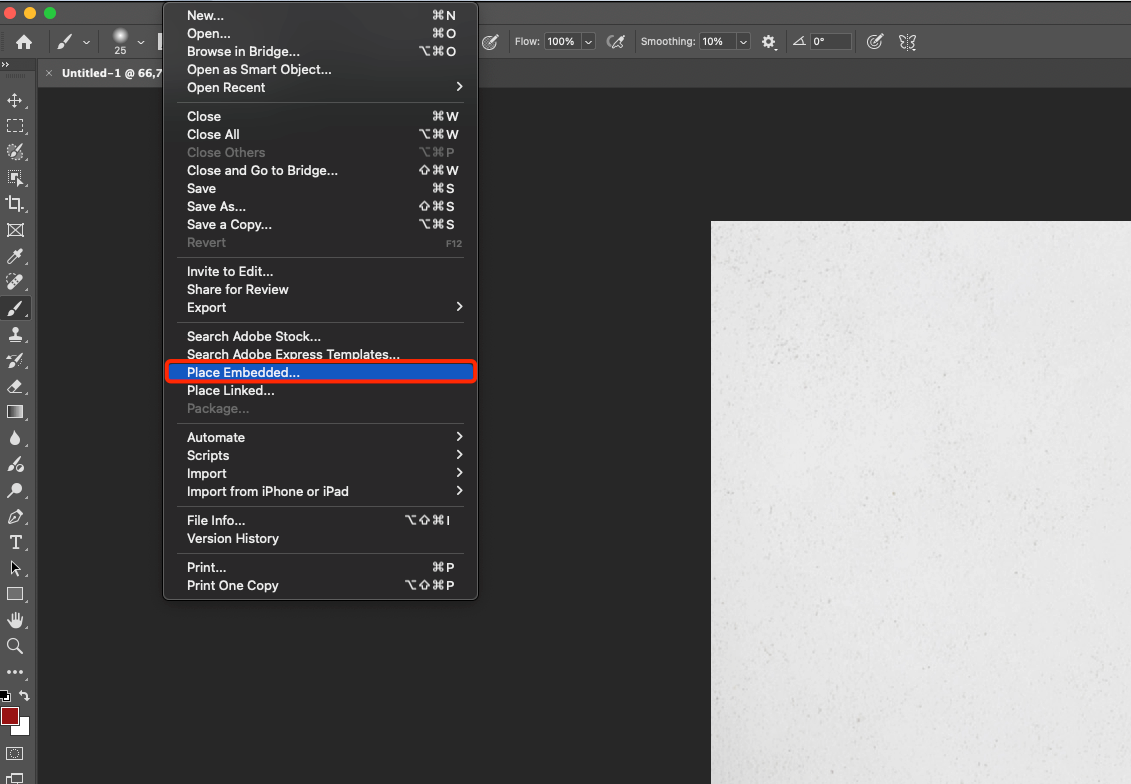
- Import the texture (File → Place Embedded).
 2. Place the texture layer on top of all the others.
3. Apply Multiply or Overlay.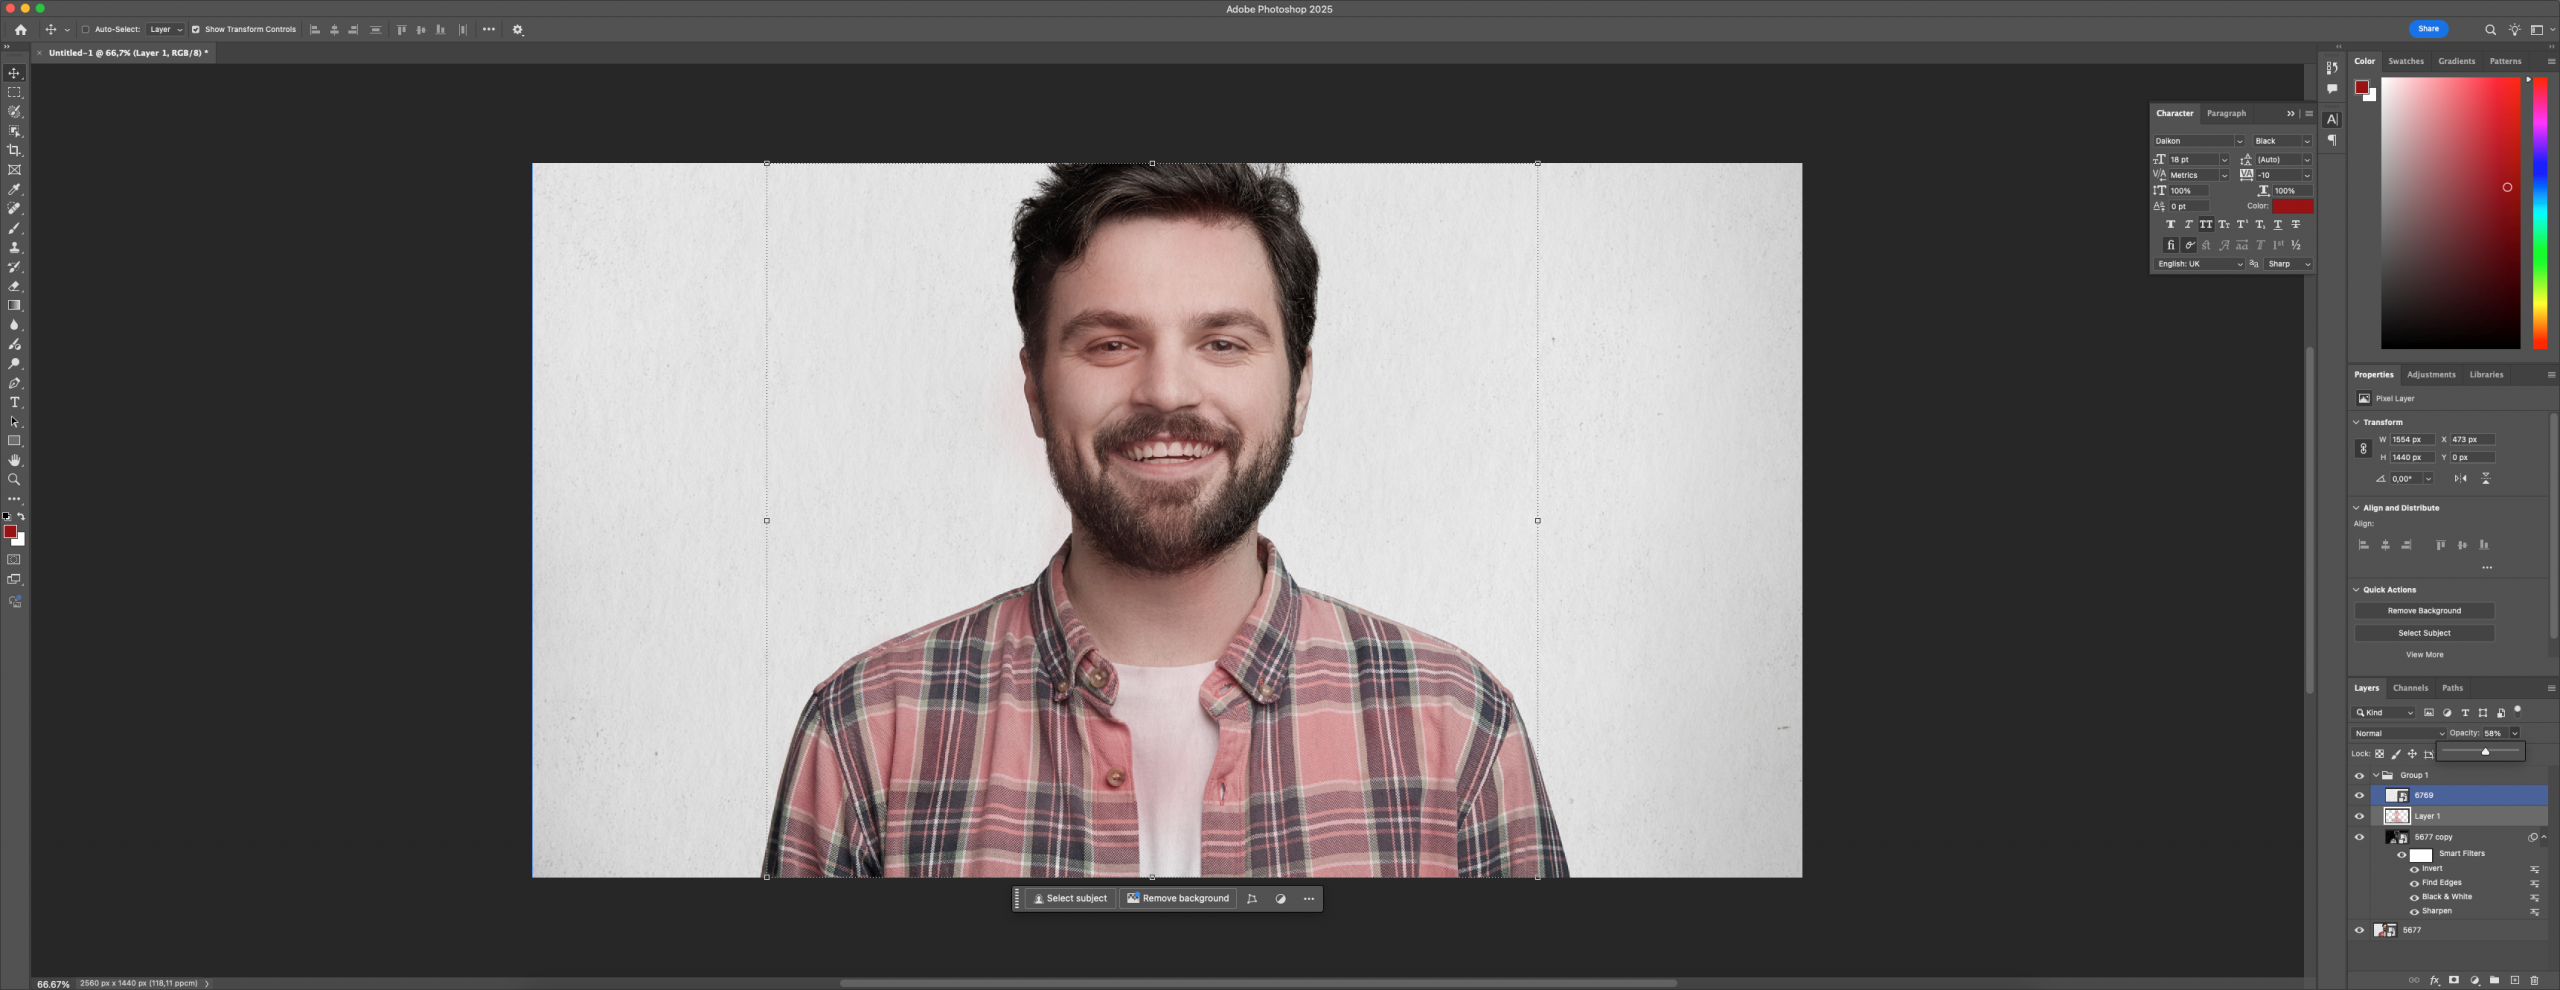 4. Adjust the opacity to a comfortable value (40-70%).
5. If necessary, make color correction of the texture (Hue/Saturation).
To make the texture blend better with the image, you can add a slight blur or noise. This will make the meshing between the layers more organic.
Step 5: Final stylization – give it depth
Here it’s important to evaluate the whole picture: is there enough airiness? Is the main subject legible? Is the background not overwhelming?
What’s worth doing:
– Create a copy of the entire composition (Ctrl+Alt+Shift+E) and apply a light Gaussian Blur.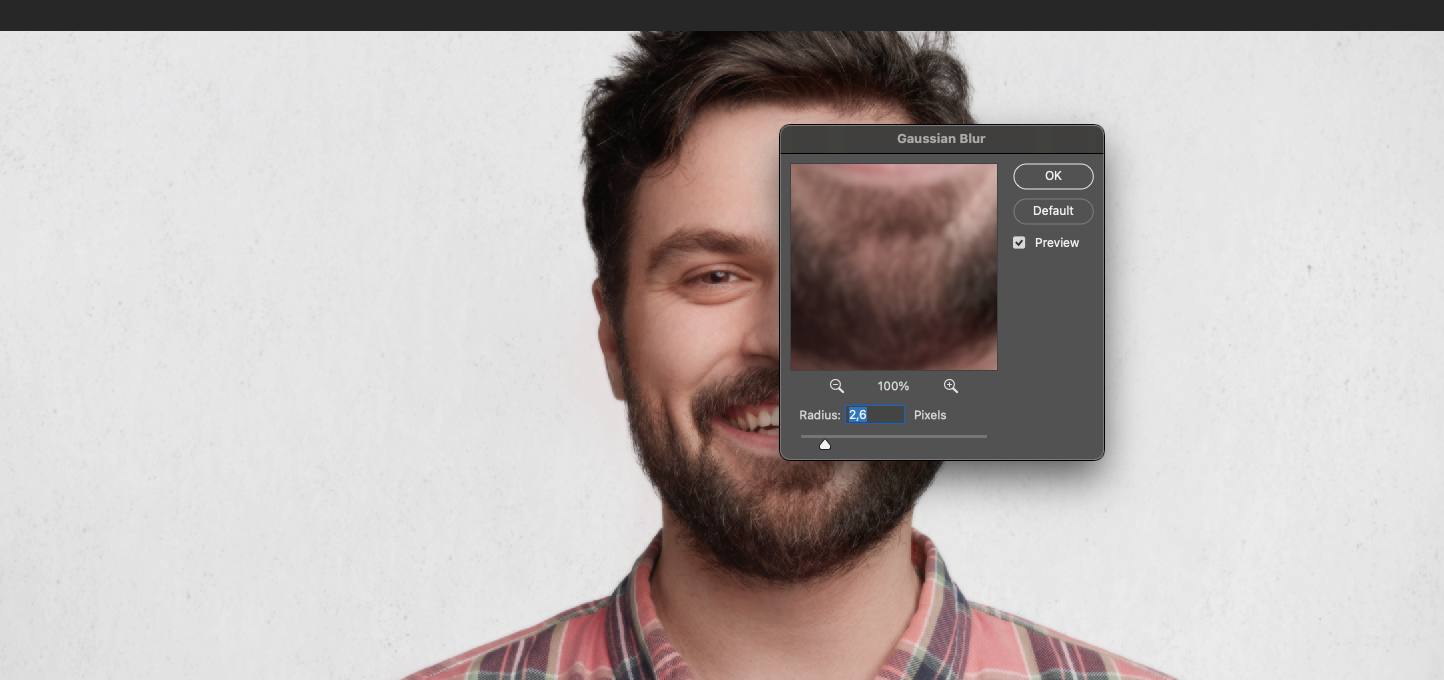 – Set this layer on top and play with the blending modes (Soft Light, Overlay).
– Use Mask for selective correction – blur the background, but keep the object sharp.
– If necessary, add a Color Balance adjustment layer to achieve artistic coloring.
The final stylization may take 5-10 minutes, but it’s what transforms your work from just a filter to a truly finished picture.
Conclusion: A photo comes to life when it has water and pigment in it
You’ve just created not just an image treatment, but almost a digital painting. This approach is valued in freelance portfolios, used in book design, illustration and giftware. This is a great exercise in taste, working with composition and light. In addition, to realize the processing of photos with a watercolor effect is quite simple and for this you do not need any special skills. Following the step-by-step guide, you can independently stylize any image and create a cool project.
And remember: every picture is different, so don’t be afraid to experiment. Change colors, combine with other effects, complicate compositions and develop your style. And when you feel confident – you can move from photos to creating watercolor illustrations from scratch. Photoshop allows you to do everything.


