
One of the important stages of professional photo processing is facial retouching. Models are unlikely to appreciate the perfectly constructed composition, background and color correction if they see any skin imperfections, redness, pimples, etc. Let’s understand how to perform face retouching in Adobe Photoshop, so that the changes do not catch the eye and look natural.
Retouching with a healing brush in Adobe Photoshop

When starting to process a model’s photo, the first thing a photographer encounters is skin imperfections such as scratches, redness, pimples, etc. But to eliminate such nuances, it is enough to apply one powerful tool called “Healing Brush”. This is a rather clever tool with which you can remove defective areas by simply pressing on them. No special professional retouching skills are needed. The program itself will select a sample of clean skin and overlap it.

Before you start retouching, you need to specify two parameters:
- Brush size.
2. The softness of the edge.
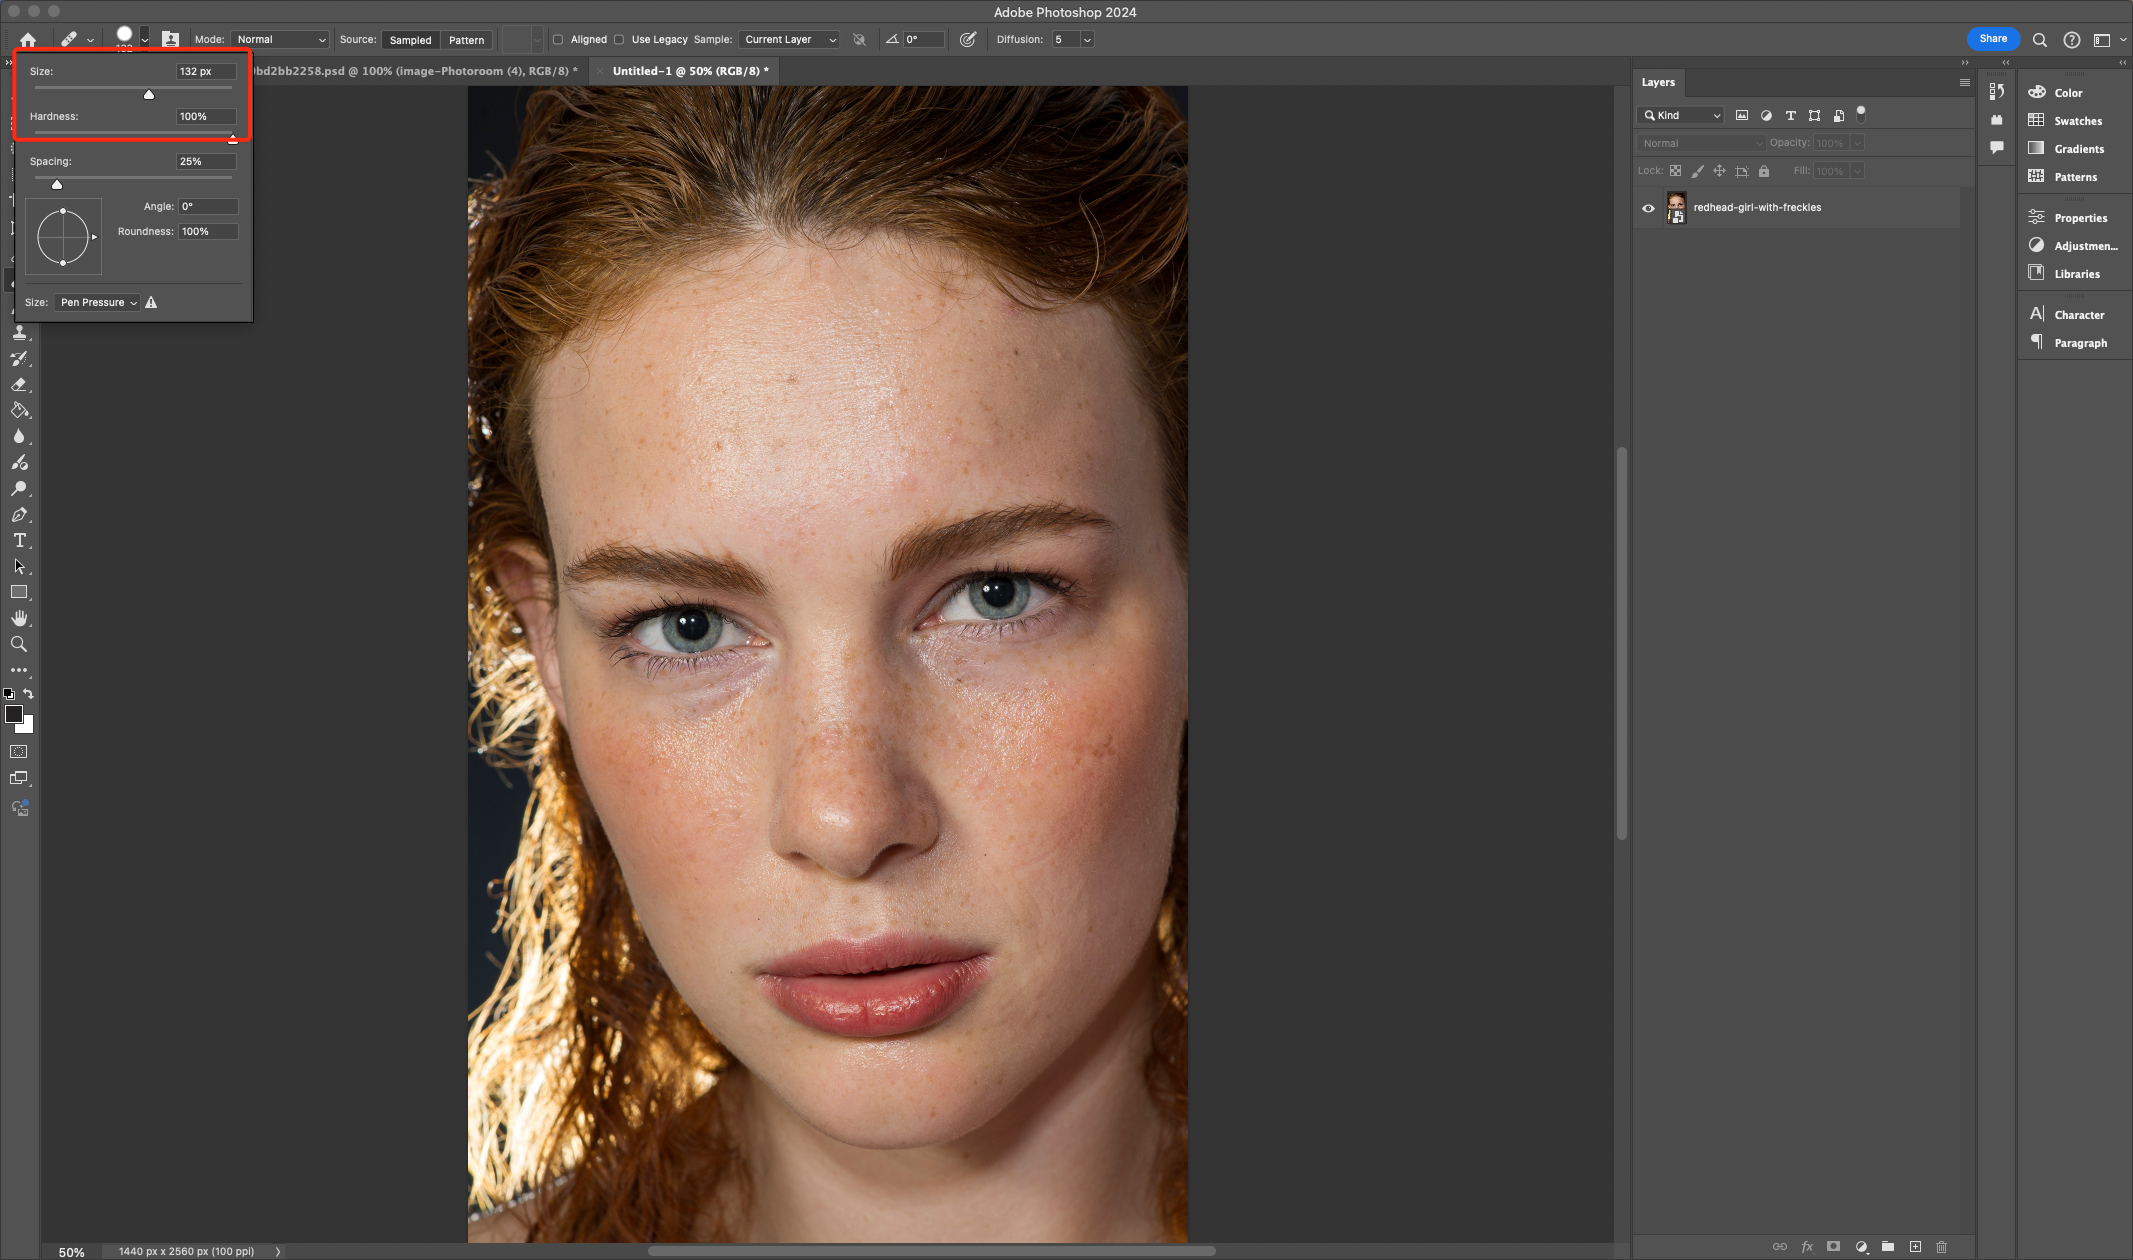
“Healing brush” is located on the toolbar, but it can also be called manually with the key ‘J’.
Before you start processing, you need to set specific parameters, starting from a simple principle: the size of the brush is selected taking into account the size of the area to be retouched. If you choose a too large version, it will cling to unnecessary elements, and too small – leave behind spots.
Regarding stiffness, it is better to choose a softer brush, but also do not choose the maximum – 2/3 will suffice. Too hard create unnecessary contours on the edges, and soft – dilute the dirt and “eat” the texture.
After setting all the settings, you should click on the defect with the brush and slowly swipe on it with the clamped LCM (if we are talking about scratches). The result will be visible immediately.

But don’t forget that the “Healing Brush” doesn’t always work as it should. If the problem area is too close to a hairline or eye, the brush may cling to these areas and not work correctly. And when working with very problematic skin, the tool often “transplants” the defect to another place.
Working with skin color
One of the attributes of a quality portrait is skin color (skintone). It is by it that you can already determine whether everything is good with the image. If there is a red or blue tint on the skin, then even an inexperienced viewer will be able to understand that something is wrong with the frame.
To get the best skin color, it pays to understand what it should look like ideally. There are also creative ideas, when the face is specially painted in one or another color to obtain an artistic effect.
If we consider the classic variant of settings, then you can start from such parameters:
- Lightness (L) – 55-80.
2. Red (A) – 10-22.
3. Yellow (B) – 14-25.
But everything is individual and depends on the source.
To control the skin color, you need to apply a Hue/Saturation adjustment layer. This can be done in the area under the circle icon.

Shape Problems and Plastics
Adobe Photoshop also has a tool called ‘Liquify’. It can be used to slightly change the shape of the face, such as pulling out an oval or making it rounder.

In current versions of Adobe Photoshop, this tool is quite clever as it supports automatic modes that allow you to enlarge your eyes with just one mouse movement and make your face look thinner.

The sliders on the right side of the screen are responsible for changing the size of the eyes, the length and width of the nose and other parameters of the shape of the face.
You can also work with the portrait manually by activating the Finger tool. It will be useful if you need to adjust the hairstyle.
Someone considers the use of “Plastics” is not quite right, arguing that it affects the reality. But here it is enough to observe the measure and not to overdo it. Without making drastic changes, the photo will remain natural and will attract attention. But if you try to change the figure from size 52 to 44 – this is clearly not the best option, and the result will look at least ridiculous.
Read also: How to remove glare on the image in Adobe Photoshop
Neural networks for retouching in Adobe Photoshop
Since recently, Adobe software developers have been actively introducing neural network processing algorithms into their software. By default, various add-ons can be added to Photoshop to retouch portraits faster and more efficiently. Some plug-ins provide a slight “blurring” of the skin, eliminating defects, although often the “soapy” effect remains pronounced and cheapens the photo.
In the case of neural networks, things are much better. They even out the color and tone of the skin, practically without affecting the texture.
However, in most cases they are not cheap, as they are commercial products. It’s still important to know how to customize them so that the result looks appropriate.
We have considered some of the easiest and fastest ways of photo retouching, with which even beginners will understand. But there are also more complex tasks that require professional skills.
Tips for getting a quality portrait at the shooting stage
To make retouching easier in the future, it’s important to treat the shooting process intelligently. Here are some helpful tips that photographers and retouchers keep in mind while shooting:
- Anything that can be done when working with a model should be done. It’s much easier to remove a small pimple, fix a loose strand or leaky mascara in person than in post-processing.
2. Use soft light for women’s portraits to get rid of uneven skin, pimples and other imperfections.
3. Use a fill source in your light scheme to fill in shadows and remove unnecessary detail
4. Consider white balance so that all sources stay at the same color temperature. If the balance is wrong – the skin tone will be incomprehensible.


