
An integral step in creating high-quality photos in Adobe Photoshop is processing. In professional understanding, it consists of two parts:
- RAW-conversion. At this stage, basic changes are made to the “raw” source file.
2. Fine color correction and retouching. During these works the photo is brought to perfection and converted to bitmap format.
The subtleties of working with layers and masks in Adobe Photoshop

The principle of processing photos through Adobe Photoshop comes down to the use of layers. You can carry out various manipulations with each layer, superimposing them on each other by means of masks. This will give enhanced opportunities to bring the image to perfection.
Quality photo processing requires a professional display with proper color reproduction. Photographers should treat their choice in a special responsible way, as this technique is their eyes. A characteristic feature of a professional monitor is the accurate transfer of colors and hues.
What are layers used for in Adobe Photoshop?
If in your childhood years you had a chance to create applications, then the features of working with layers will be clear: on each previous layer with different settings and content, the next one is superimposed. As a simple example of such a procedure, you can cut an object from the background and move it to another background. Let’s try to accomplish the task using standard Adobe Photoshop tools.
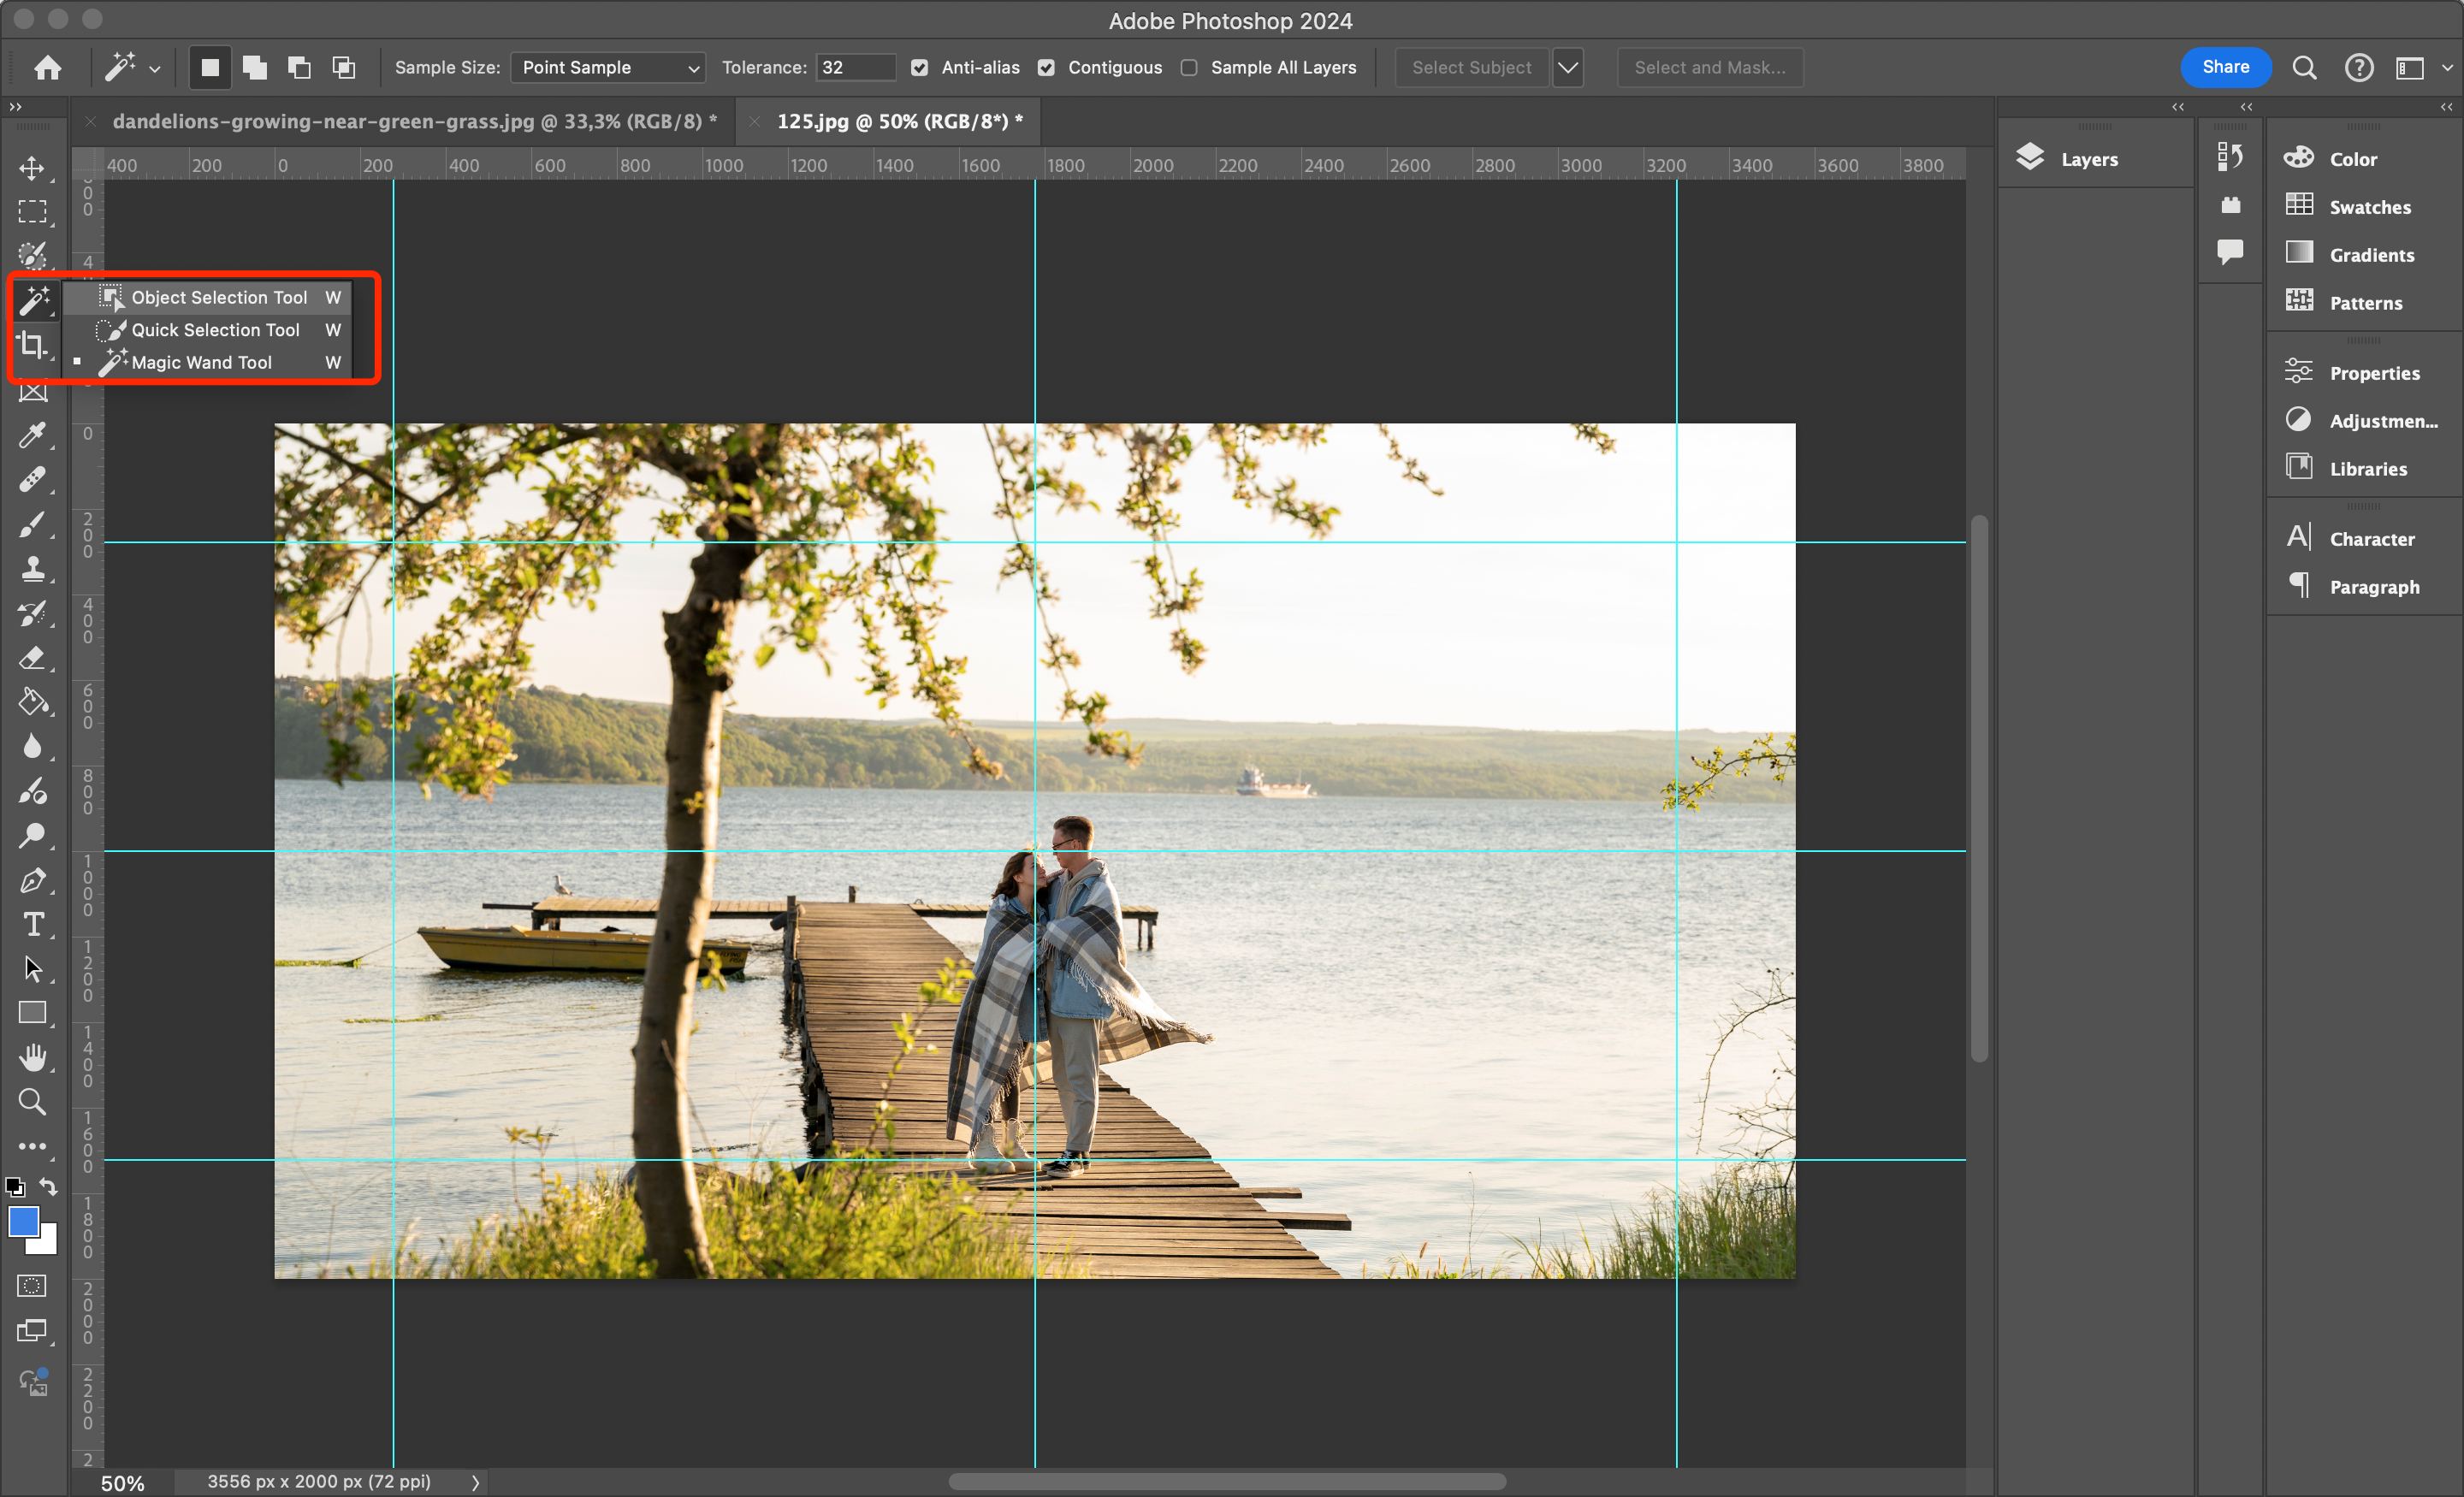
We need to transfer people from the frame to a white background. First of all, we should select them with the Object Selection Tool.

This is a standard selection tool, which is based on artificial intelligence and automatically identifies the necessary elements. In terms of speed, it surpasses other tools, although it does not always give guaranteed accuracy. Manual adjustment of parameters is often required to achieve the desired results.
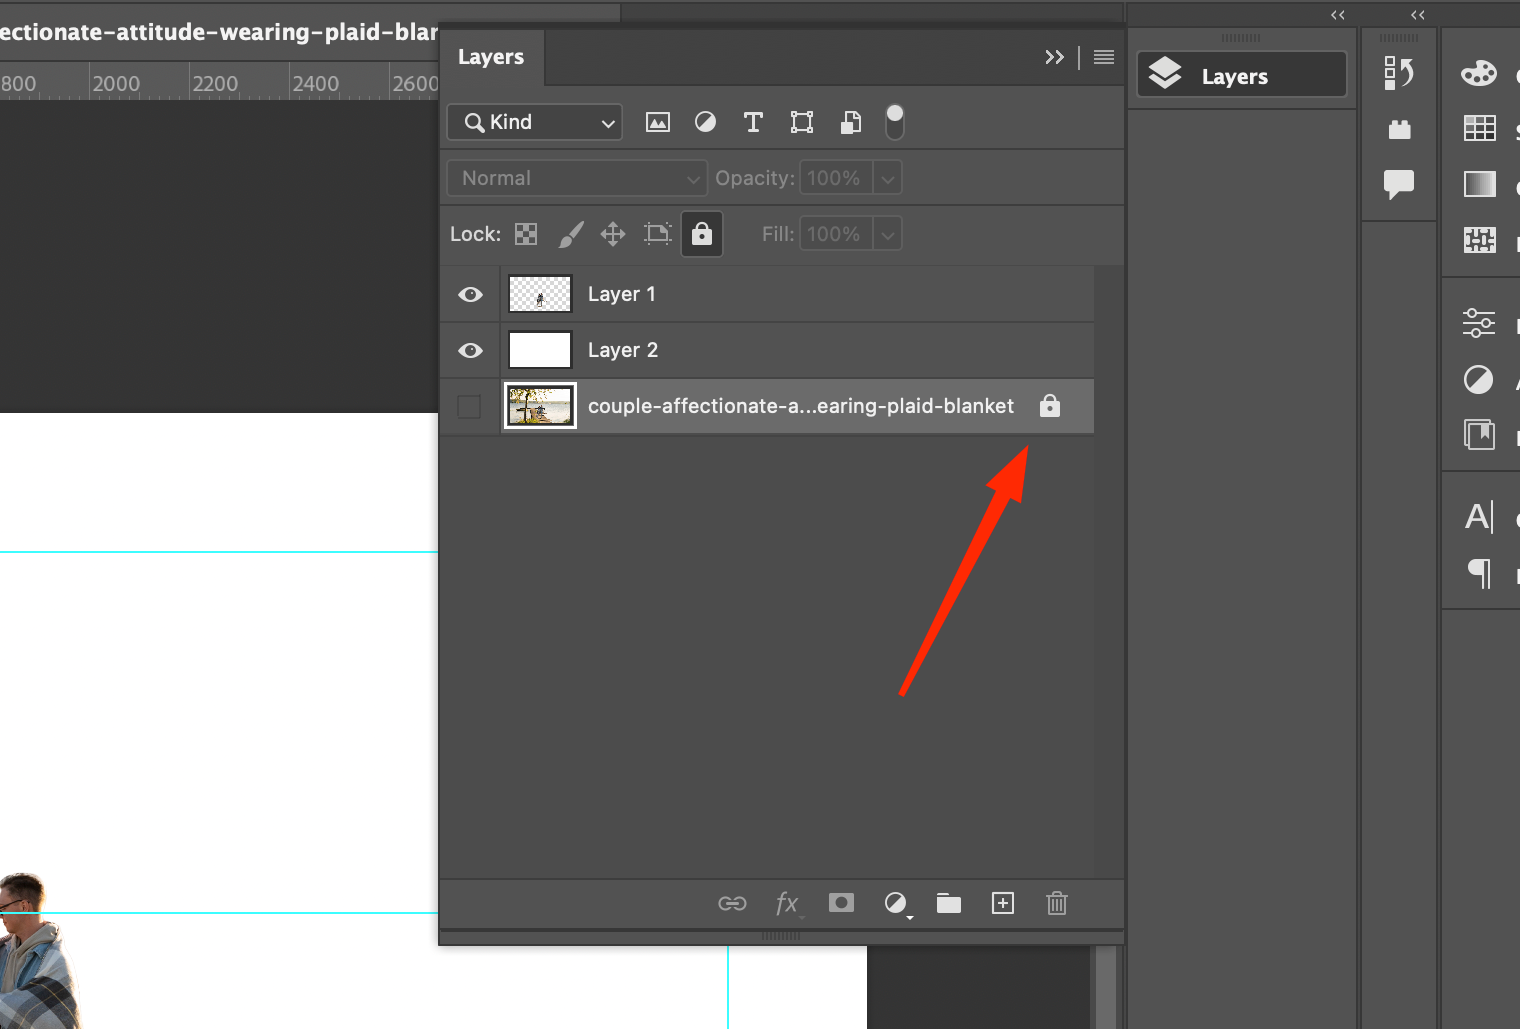
To work with a particular object, you can move it to a new layer by performing the combination “Ctrl” + “J” or “Cmd” + “J”
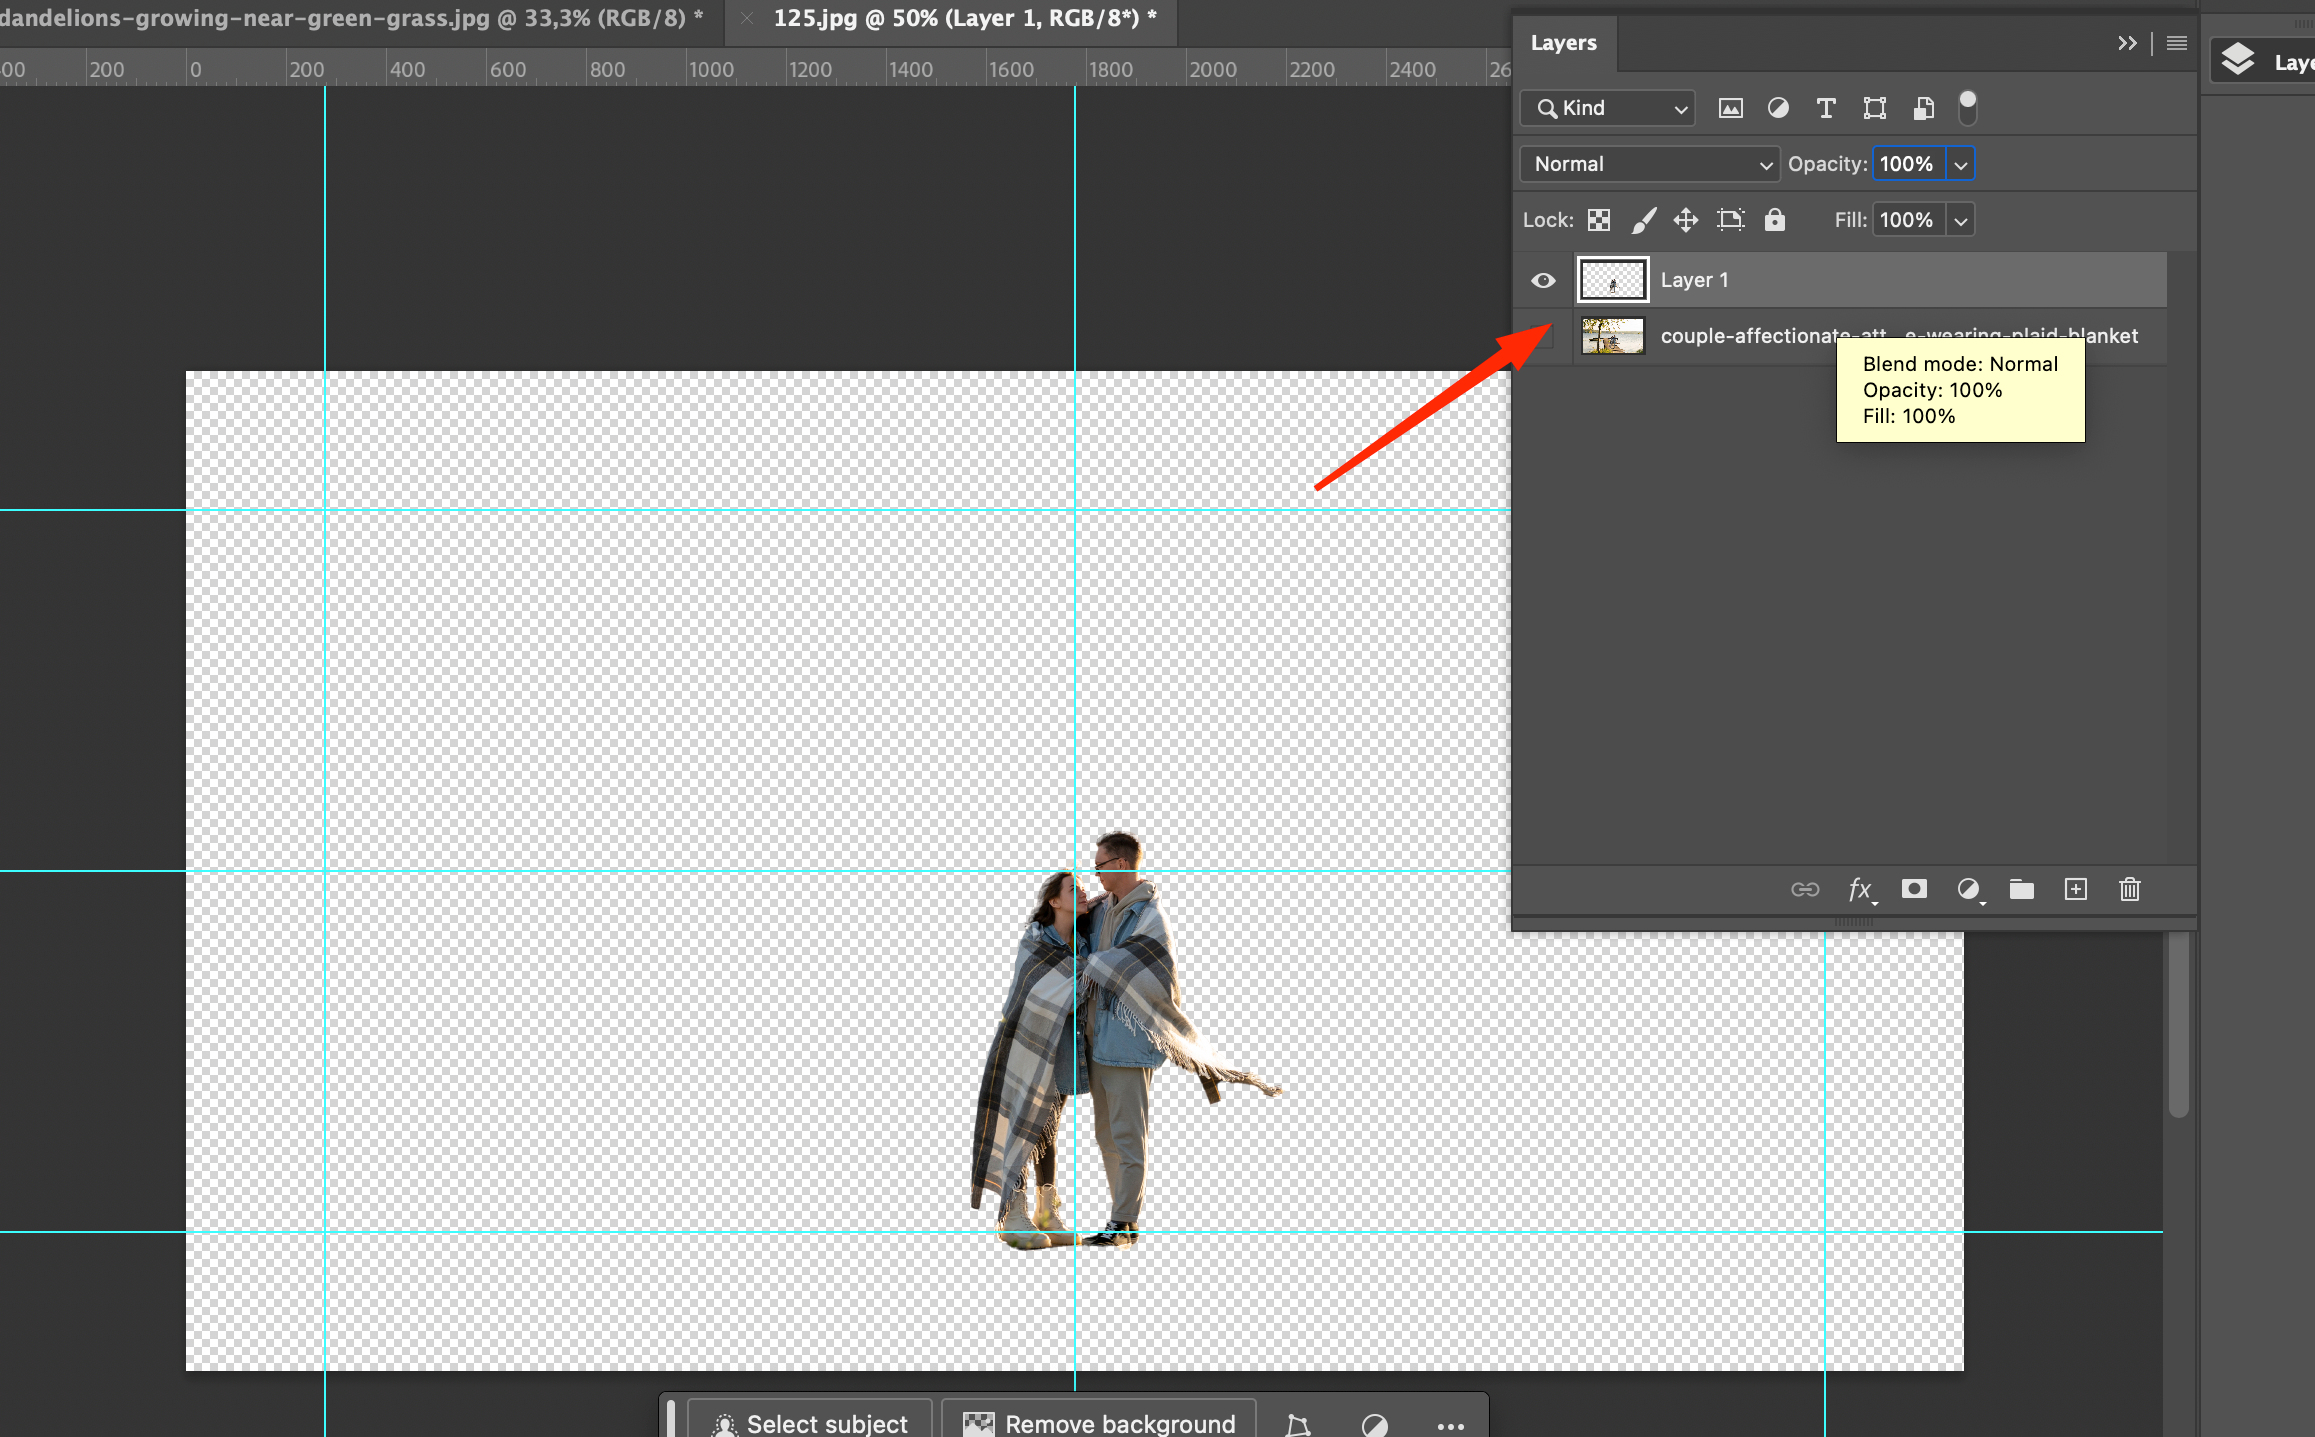 The created layer will be moved to the “Layers” window. Keep in mind that Adobe Photoshop allows you to freely move, add and close layers that are not on the screen, because of which the display of the interface may differ from the one shown in the example. However, you can always change the working environments through the Windows menu. Other panels are available there as well.
When the desired element is on a new layer, you can make the background opaque by clicking on the “eyes” icon. Now you will see the image of the couple on the “checkered” background. This principle is used to show transparency. Certain formats can convey transparency, like GIF, PNG, TIFF. If you save an image in them, the transparency will be transmitted in full, whereas in JPEG you will get a white background.
To create a white background manually, you need to apply the “Fill” tool, prepare a new layer and color it white.
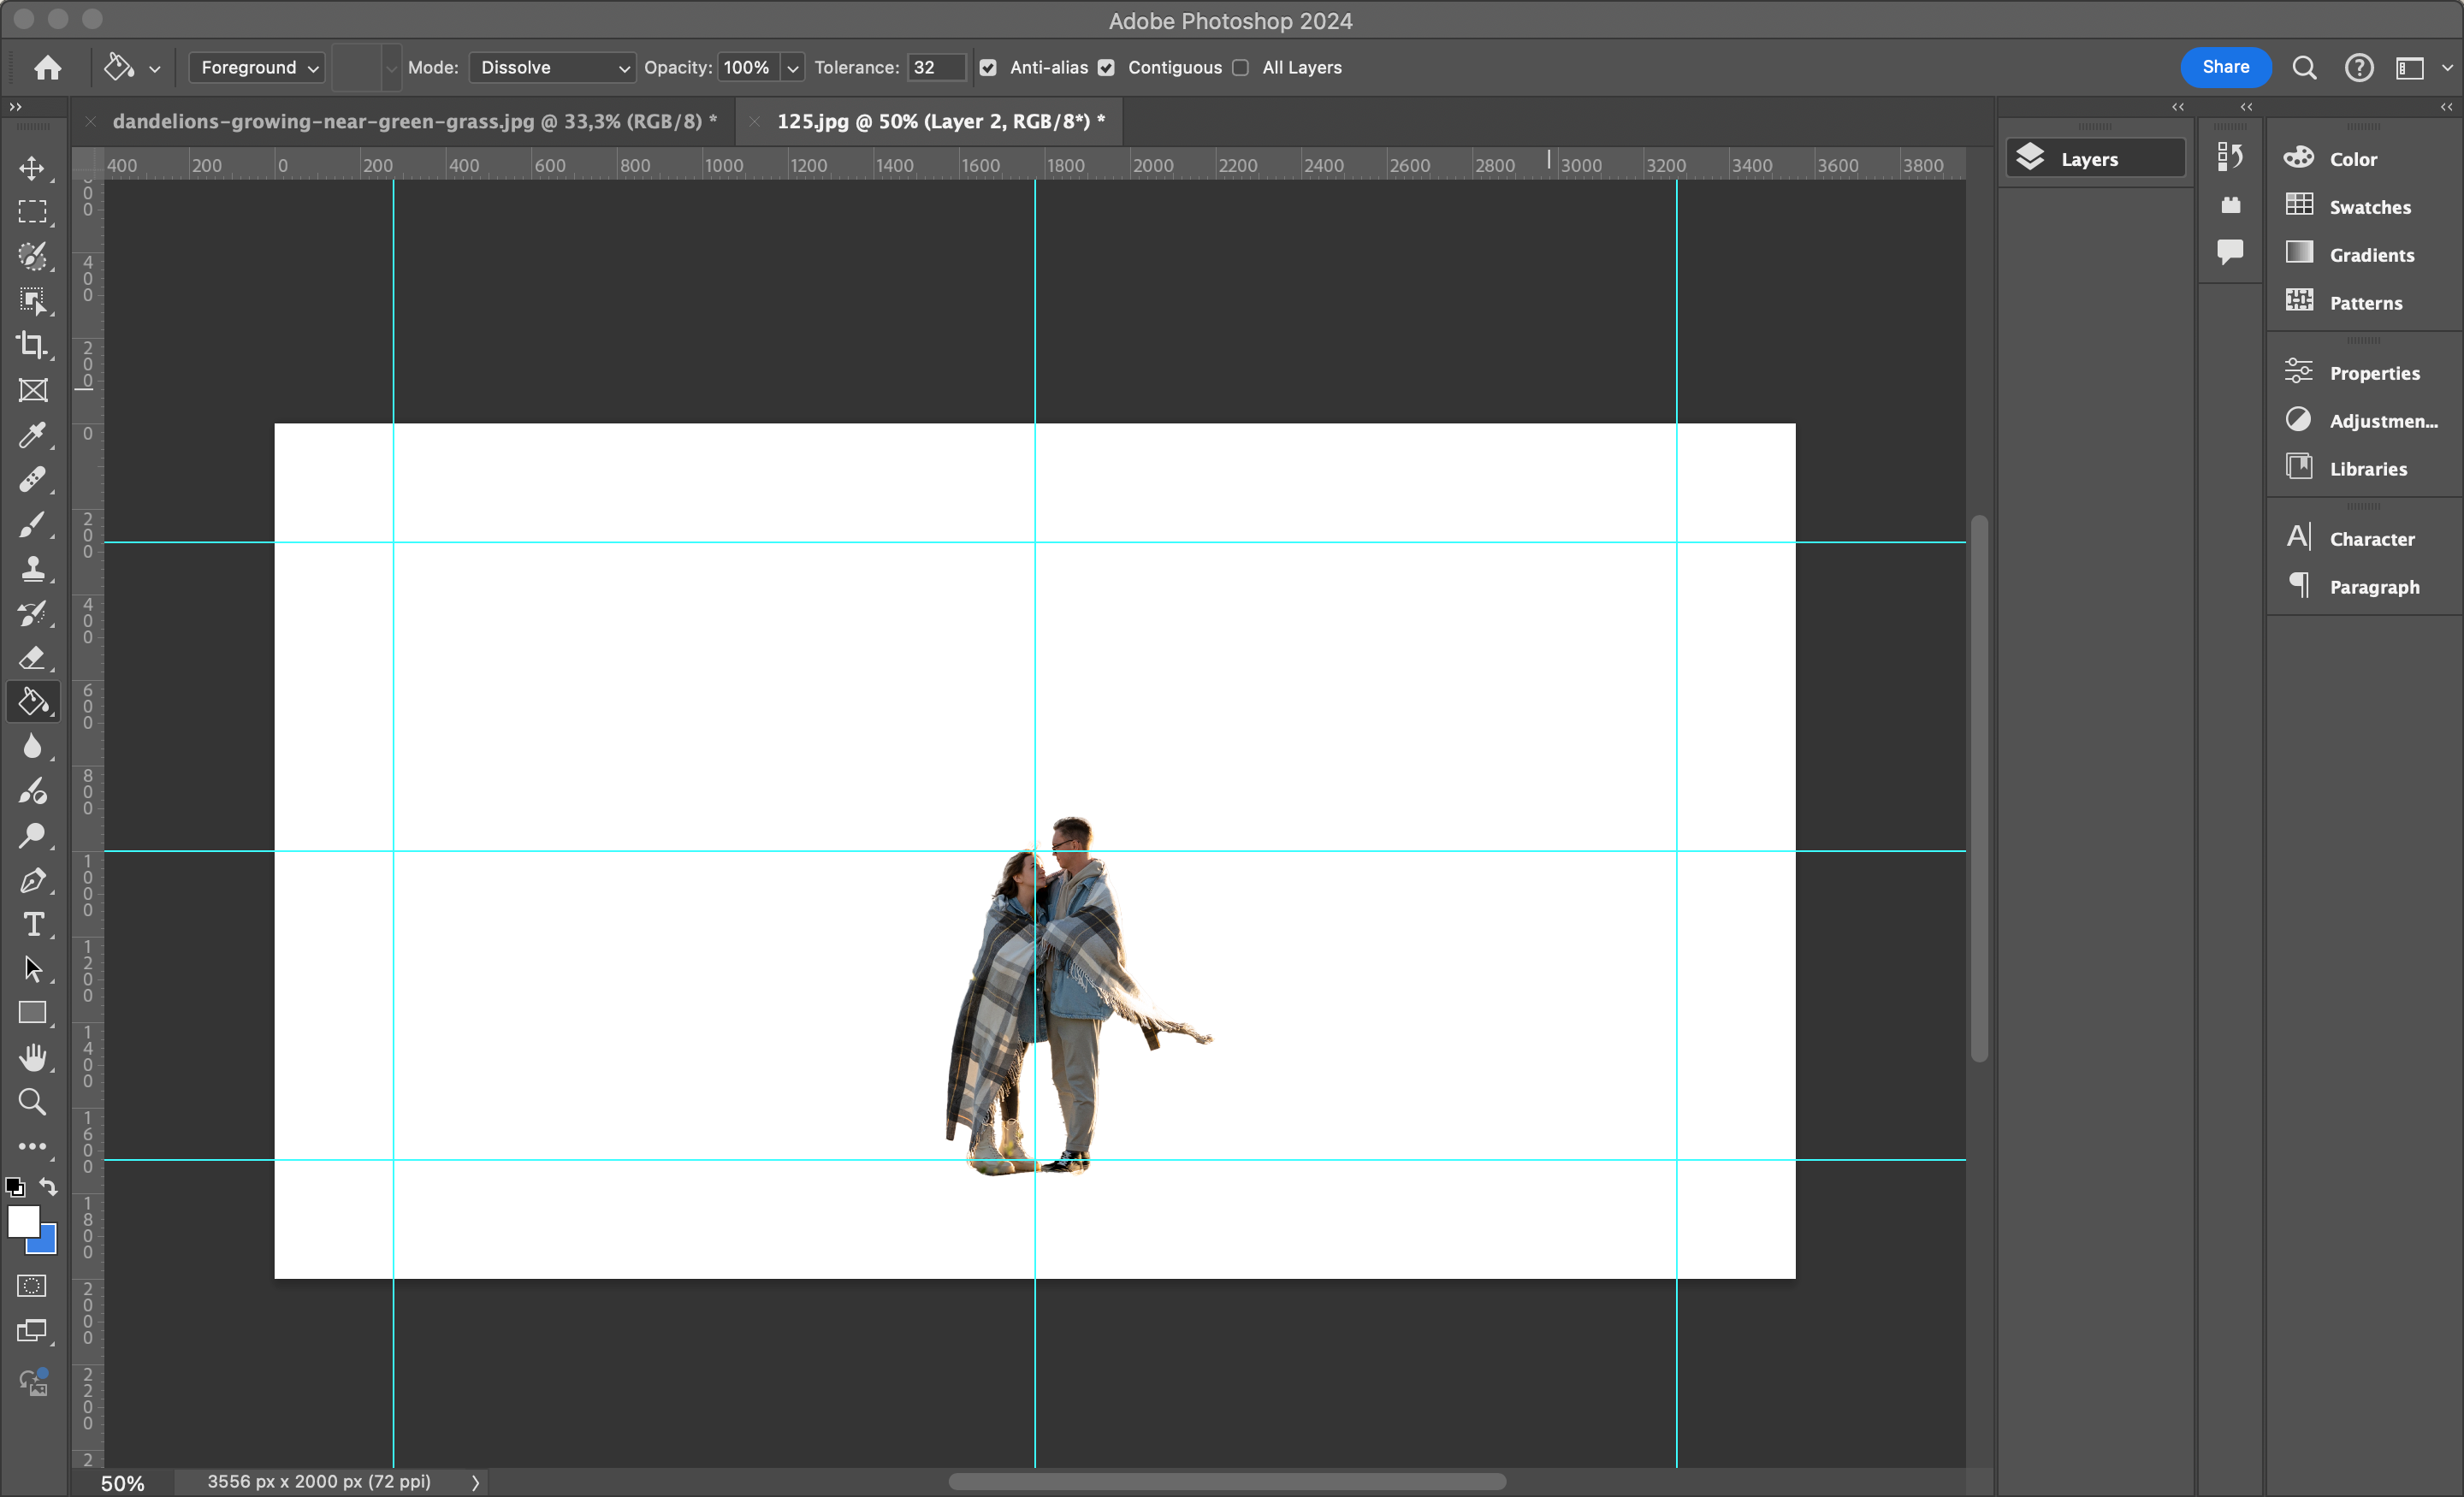
That’s it, the image of the couple is on a white background. Now we can move it wherever we want by selecting the desired picture.
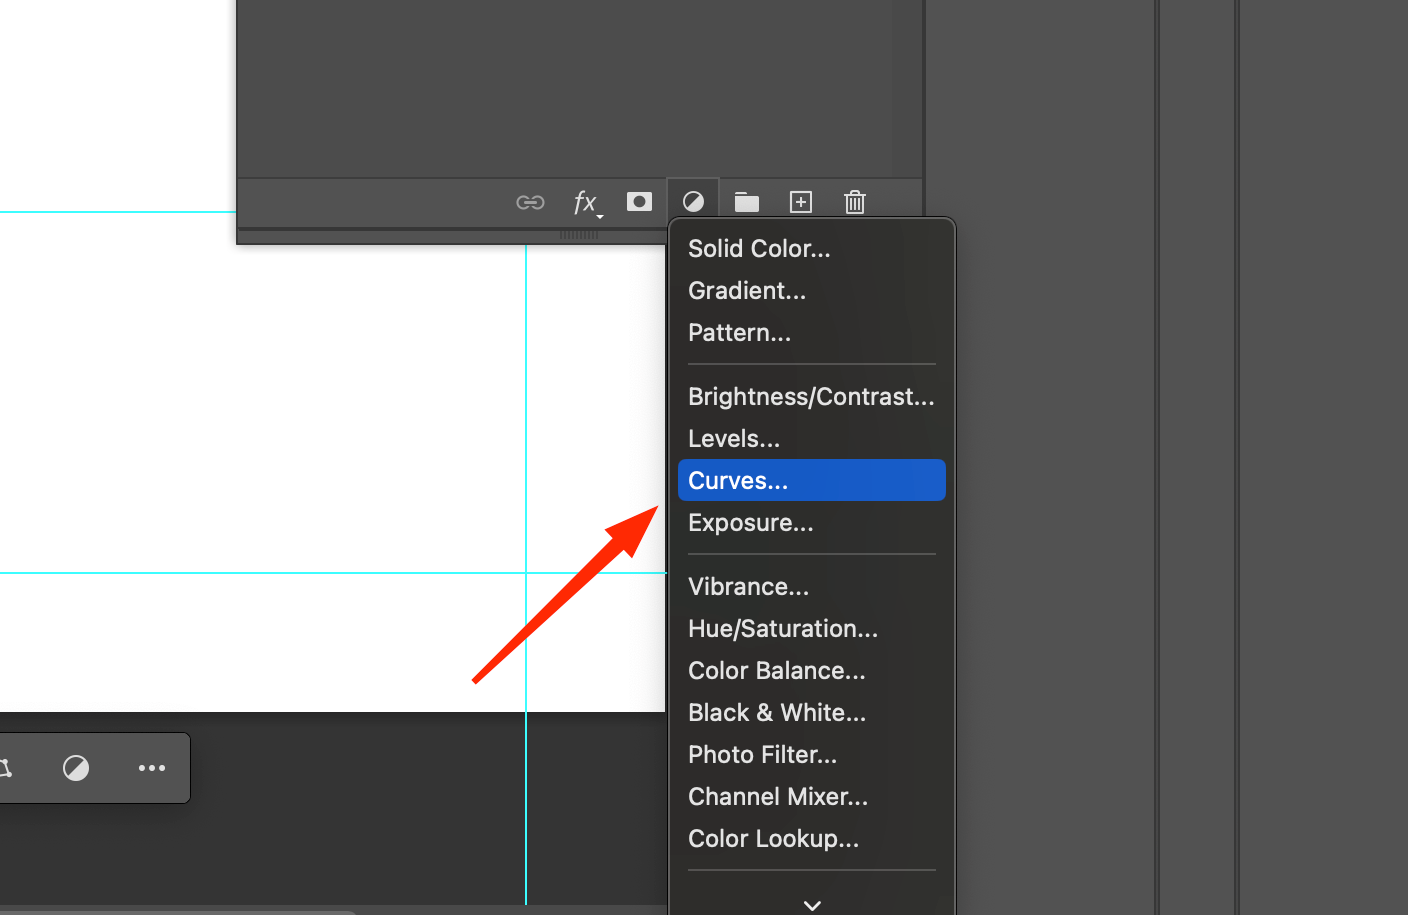
Adjustment layers
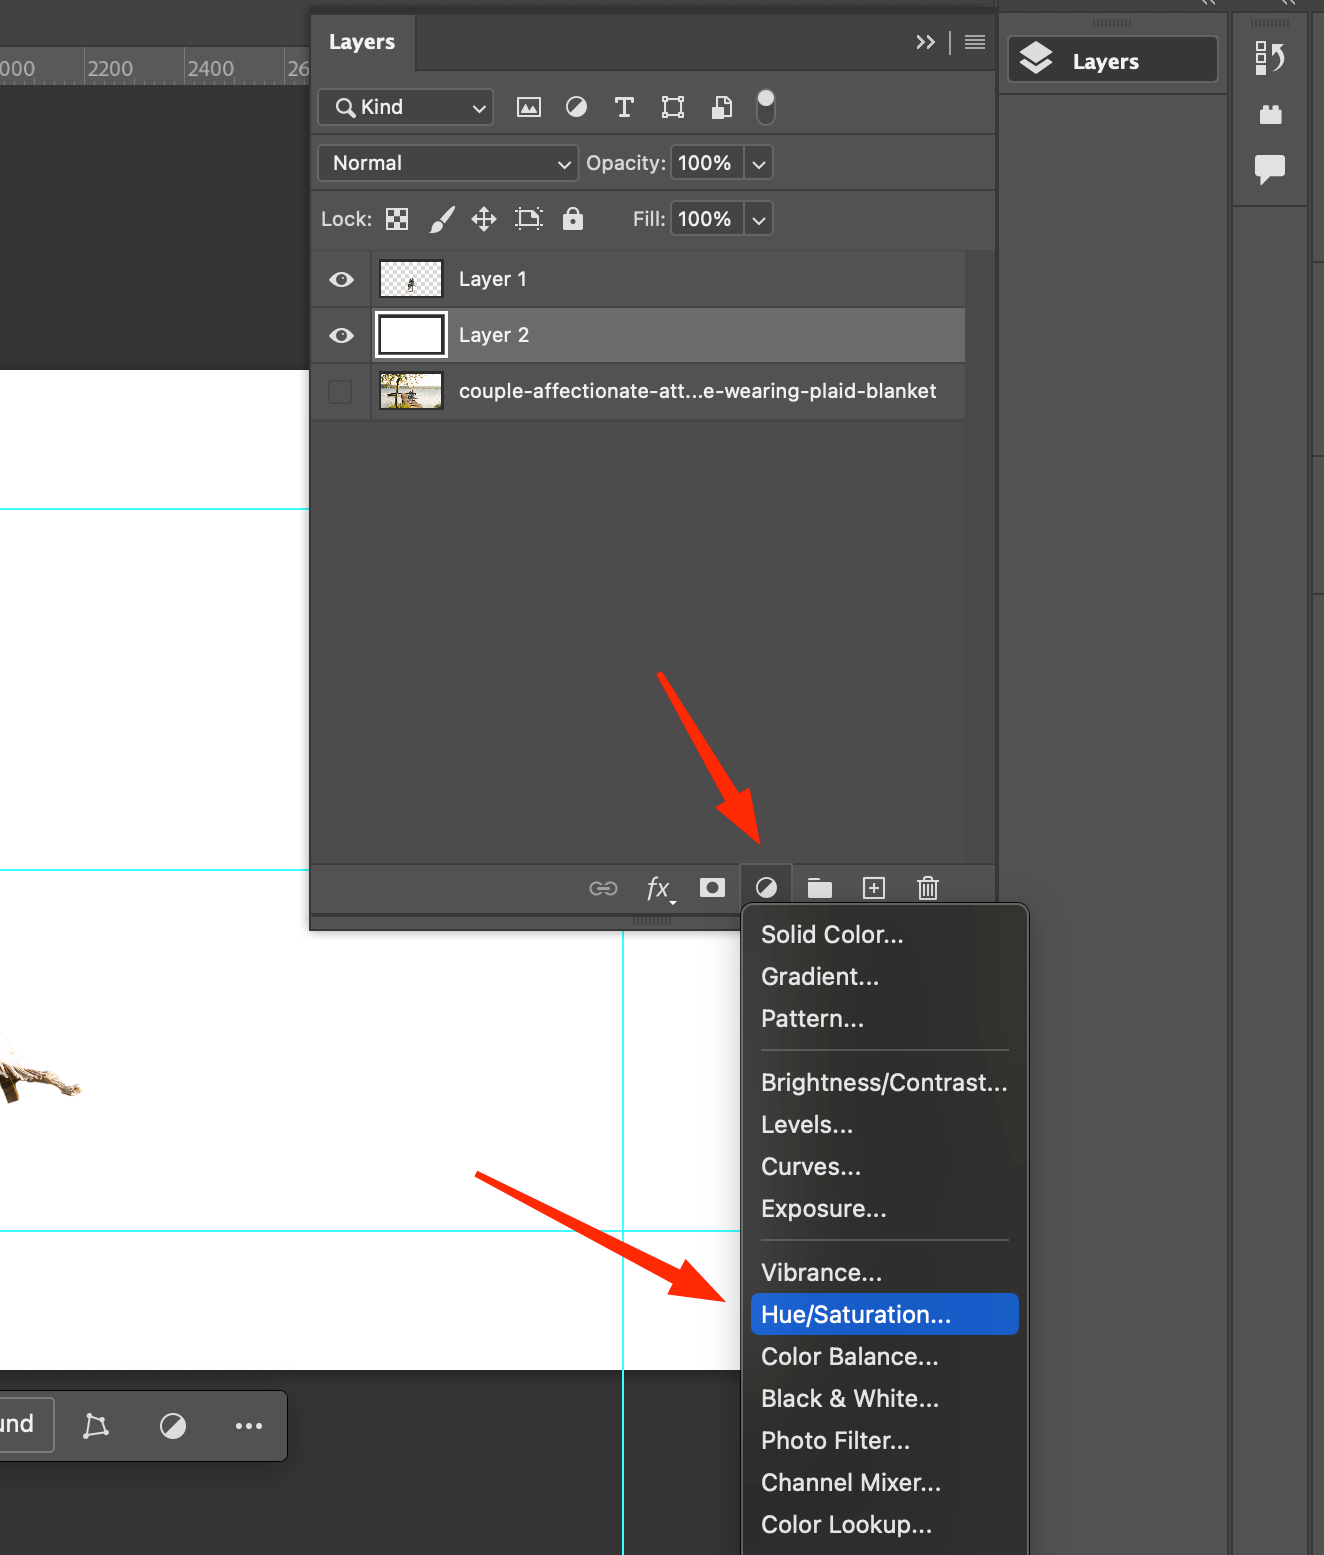
In addition to the layers that contain a particular image, Adobe Photoshop also supports adjustment layers. They are responsible for controlling various adjustments. For example, to make the background black and white, while preserving the color of the selected element, it is worth adding a Hue/Saturation layer in the Augments panel.
As you know, many actions in Adobe Photoshop are duplicated and can be done with different tools. To give colorlessness, you need to remove Saturation to -100, which will cause the frame to become black and white. You can also move the correction layer under the layer with the couple. In this case, the top image will remain colored and the background will remain black and white.
You can also apply an adjustment layer mask. Here the layer will act on separate parts of the frame. Now let’s try to move the adjustment layer to the very top. To do this, you need to select the white rectangle located to the left of the layer name. In this case, we will work with the layer mask. By default, they are white (i.e. opaque). To get a “hole”, you should use the “Eraser” and remove the unnecessary element of the mask, or simply activate a black brush.
Adjustment layers themselves can perform different tasks. Among the most popular are Curves and Hue/Saturation.
Thus, we were able to make a postcard with the couple. The background layer will no longer be used, so you can simply delete it by clicking on “Delete” or moving it to the trash manually. The Background with the original background we don’t need either.
It can be deleted even easier. Before that, you should remove the “Block” by clicking on the lock icon.
After that, right-click on the name of our layer and find the Merge Down tool. The layer will merge with the one below it. The Flatten Image tool, which merges all layers, is also available. You can use it only if you are satisfied with the final result and there is no need to change anything in the adjustment layers.
If you choose native PSD, PSB as the format, the file will be saved with all layers, so you can make changes to them in the future. As for the TIFF format, it is partially compatible with layers. It is worth considering that the more layers, the more space will be needed in the storage of the device. The “lightest” format is JPEG, but it does not provide storage for layers. Photographers often use two formats: the original file is saved in PSD or TIFF, and a copy is saved in JPEG (as a rule, reduced to post the result on social networks).
In this tutorial, we’ve highlighted a few basic properties and features of working with masks and layers. By following the instructions, you can quickly learn how they work and other features.


